Руководство по программированию АТС ipLDK версий 3.8 (рус. язык) Инструкция пользователя программы PC Admin - программирование АТС версий.
Инструкция пользователя программы ezAttendant - системный оператор пользователя программы PC Admin - программирование АТС версий 3.х.
(.xls ~167.5 Kb); Руководство по программированию АТС ipLDK версий пользователя программы PC Admin - программирование АТС версий 2.х ( англ. язык) (.pdf ~317.56 Kb); Инструкция пользователя программы CRS - запись.
В этом разделе размещены техническая документация, программное обеспечение, материалы по маркетингу для ipLDK-100, доступные для скачивания. Раздел регулярно обновляется. Внимание! Перед прошивкой плат внимательно ознакомьтесь с предлагаемой ниже таблицей соответствия версий софта и оборудования!!
Installation and User Guide
오류! 색인 항목을 찾을 수 없습니다. ipLDK PC Admin. Installation and User Guide ISSUE 3.7.3 -i- REVISION HISTORY Issue ISSUE 0.8 ISSUE 1.0 ISSUE 1.1 ISSUE 1.2 ISSUE 1.3 Date NOV/2000 DEC/2000 FEB/2001 JUL/2001 AUG/2001 Description of Changes Initial Release Draft version Several values for timers were changed Some detail information were added. CAPI2032.DLL Information Admin Password information VoIB Programming(PGM 340) VMIB Prompt Usage Æ (PGM 167 is modified) Max Queue Call Count in Ring Group Æ Added DCOB Admin programming Æ PGM186/187 was added Gain Control CTR SLT/COL were added Æ PGM 400~411 ipLDK100 Admin is added SLT Flash Drop(PGM111-Flex15) Æ Added Offnet Prompt Usage(PGM160-Flex12) Æ Added Offnet DTMF Tone(PGM160-Flex13) Æ Added VMIB Prompt Gain(PGM161-Flex12) Æ Added DID Restriction(PGM114-Flex14) Æ Added DID Call wait(PGM114->Flex15) Æ Added Add ipLDK300/100 Office/Networking PGM 320~324(Networking) Add ipLDK300 Hotel Administration PGM 300~308(HOTEL) S/W Version A.0Aa A.0Ad 1.0Aq 1.0Aj(PC) 1.0Ba(PC) 1.0Dd(MP) ISSUE 1.4 AUG/2001 MP:1.0Ea, PC:1.0Ba MP:1.0Ea, PC:2.0Aa MP:1.0Ea, PC:2.0Aa MP:1.0Ea, PC:2.0Aa MP:1.0Ea, PC:2.0Aa MP:1.0Ea, PC:2.0Aa MP:1.0Ea, PC:2.0Aa MP:1.0Ea, PC:2.0Aa MP:B.0Aa, PC:B.0Aa MP:1.0Fc(Office) MP:1.0Fd(Hotel) PC:1.0Fd(ipLDK300) PC:B.0Bb MP:B.0Af(Office) MP:B.0Af(Hotel) PC:B.0Af(ipLDK300) ISSUE 2.0 ISSUE 2.1 NOV/2001 DEC/2001 ISSUE 2.2 FEB/2002 Automatic Port Detection was enabled. -2- ipLDK PC Admin. ISSUE 2.3 MAR/2002 PGM185 CIDU Setting Æ Added PGM451 Network DB Print Æ Added PGM112 –Flex15(Stop Camp On) Æ Added PGM143 – Flex7(CLI Transit) Added Extension Number Range is changed Æ Changed(Only ipLDK100, 96 Æ 128) PGM 112 Station Attributes II Æ Flex16 Line Length was added (Only for SA Telkom) PGM 142 CO Attributes II Æ Flex14 Line Length was added PGM 340 Flex6 Default Codec was added Flex7 Default Gain was added Flex8 No Delay was added Flex9 Throughput was added Flex10 Reliability was added PGM 412~416 Special Gain Control Æ Added(Only for SA Telkom) PGM185 Flex6 CID type II Æ Added. PGM145 CO Ring Assignment Display Æ Added PGM231 Flexible numbering Table Æ Net number is available Added some program feature for MPB 2.2 version. Added some features with MPB 2.2Fb. - STN Auth check(PGM112-F20) - DISA wait timer(PGM142-F15) - CO to CO Xfer CPT Check (PGM160F16) - Fwded busy dest.(PGM167-F5) - Transit connect timer (PGM181-F16) - V3 Feature added. - Main GUI was changed. - ipLDK20 specification was added. - Issue 3.7.3 MP:B.0Ai(Office) MP:B.0Ai(Office) PC:2.0Ai(300/100) ISSUE 2.4 JUL/2002 MP : 2.0As PC : 2.0Ba MP : 2.0As PC : 2.0Ba MP : 2.0Ba PC : 2.0Ba MP : 2.0As PC : 2.0Ba MP : 2.0As PC : 2.0Ba MP : 2.0Ba PC : 2.0Ba MP : 2.0Ba PC : 2.0Ba ISSUE 2.5 ISSUE 2.6 DEC/2003 FEB/2004 MP : 2.2Fb PC : 2.2Fa ISSUE 3.0 ISSUE 3.1 ISSUE 3.11 ISSUE 3.12 APR/2004 JUN/2004 SEP/2004 OCT/2004 Added some comments for TELSTRA Added some feature and fixed problem PC : 3.0Ba MP : 3.0Bb -3- MP : 3.0Aa PC : 3.0Aa MP : 3.0Ae PC : 3.0Ae AUS PC : 3.0Ao ipLDK PC Admin. ISSUE 3.2 DEC/2004 Added some feature for Korea PCM160-F19 Call Log List Num PGM185-F7 Fast CID Mode PGM171-F5 Dial Tone Src PGM171-F6 ICM RB Tone Src PGM177-F15 Print MSN on SMDR PGM177-F16 Print Caller Number PGM186-F13 R2 Out Digit Timer PGM186-F14 R2 Error Prompt Usage PGM186-F15 R2 Busy Prompt Usage PGM186-F16 R2 Annc Prompt Usage PGM187 Send Sblock CMD ALT Destination in PGM191 CIR/TRM Group Max Queue Call Count in PGM191 CIR/TRM Group PGM155-F2 Long Distance Setting Max CO Number changed for ipLDK20 ( from 12 Æ 16) Added some Admin feature PGM111-F22 Caller V.Over PGM114-F21 Long Cli 1 PGM114-F22 Long Cli 2 PGM143-F12 CLI type PGM236-F4 CLI Added some feature only for ipLDK20 PGM203-F5:B-channel select type PGM203-F6:Barring Up code PGM203-F7:Barring Down Code PGM203-F8:CFU Active Code PGM203-F9:CFU Deactive Code: PGM203-F10:Memotel Norm Code PGM203-F11:Memotel Nans Code PGM203-F12:Memotel LNR Code PGM203-F13-Memotel Nego Code PGM203-F14:Memotel Retr Code PGM203-F15:Memotel Deactive Code PGM227 Auth code table(changed code range and added COS display&assignement) PGM450 Initialization(STN/CO range is available) PGM424 DKT gain was added(SAF only) PGM415/6 : DKT gain were added(SAF only) Issue 3.7.3 PC : 3.1Aa MP : 3.1Ab (These were added only for Korea market) JAN/2005 ISSUE 3.2.1 FEB/2005 ISSUE 3.2.2 MAR/2005 ISSUE 3.3.1 APR/2005 - PC : 3.1Aa MP:2.0Ab (ipLDK20 only) PC:3.2Aa MP:3.2Ab PC : 3.2Ba MP:2.1Aa (ipLDK20 only) PC:3.3Aa MP:3.3Aa(ipLDK20,2. 1Ab) - -4- ipLDK PC Admin. ISSUE 3.5.1 MAY/2005 PGM183 In Room Indication(F1~F10) Added. PGM184Chime Bell Attribute(F1~4) Added PGM113-F11 Mute Ring SVC Added PGM322-F3 GateKeeper Usage Added Member FWD was added in HUNT Group Attribute(CIR/TRM, UCD, RING type only) PGM341 GateKeeper(F01~22) added PGM181-F LCO Connect Tmr(Added) PGM142-F16 DISA/DID Delay Timer(Added) Warning message was added with USB SIO convertor. PGM11-F23 SIP User BIN was added PGM140, On-demand case was added PGM181-F19 LCO CPT Detect Timer was added PGM191-UCD DND Ring timer was added SIP Attributes 1, 2 were added. PGM340 added below items. Firewall IP Address VOIB Mode DSP Use Silence Detection DSP Use echo Canceler SIP DTMF mode SIP Jitter Buffer Voice monitor PGM341 deleted below items. Out Band DTMF CNG Silence Detection Echo Cancel Voice Monitor Jitter Buffer Length Music Source range was changed(PGM190, Station Group) G.729 was added in PGM382 Emergency Intrusion(PGM109) Emergency Supervisor(PGM112-F24) LCR Dial Tone Detect(PGM161-F22) Hotel Feature was added in the manual.(Including ipLDK20 Hotel) Issue 3.7.3 PC:3.5Aa MP:3.5Aa(ipLDK20,3. 0Ab) ISSUE 3.5.2 MAY/2005 - PC : 3.5Ab MP : 3.5Ab(ipLDK20, 3,0Aa) ISSUE 3.5.3 ISSUE 3.6.1 SEP/2005 SEP/2005 MP : 3.6Aa PC : 3.6Aa - ISSUE 3.6.2 NOV/2005 - ISSUE 3.6.3 JAN/2006 MP : 3.6Aa PC : 3.6Ba -5- ipLDK PC Admin. ISSUE 3.7.1 AUG/2006 CIR/TERM/Ring group Q count MP : 3.7Aa PC : 3.7Aa display was added - PGM290 SMSB Attributes were added . F1-IP Address, F2-Gateway address .F3-Subnet Mask, F4-Server IP Address .F5-Password - PGM291 SMS Setting .F1 : SMS Center Number .F2 : SMS delivery number - PGM292 SMS CO Attributes .F1 : SMS station assign / Display .F2 : SMS outgoing CO .F3 : Non CID SMS - PGM111 add below items .F22 : caller Voice Over .F23 : SIP U-ID table .F24 : Listen Redial DTMF - PGM 322 add below item. .F2 : VOIP Mode .F5 : DTMF Mode - PGM340 uses VOIB slot number and added below items. .F18 : H.323 Mode .F19 : Early H.245 .F20 : H.245 Tunneling .F21 : TOS Preference .F6 : Default Codec added G.729A .F12 : VOIB Mode added Dual mode - SIP 1 PGM added below items. .Remote Party ID .181 Message .IP Centrex - SIP 2 PGM range was changed from 32 to 96 with ipLDK100/300/300E(ipLDK20 has no change). - PGM382 –Flex5 Default Codec added G.729A type - PGM177 added below items .F17 : ICM SMDR Save .F18 : ICM SMDR Print .F19 :SMDR Interface Service .F20 :I-SMDR connection Type - PGM181 added below item. .F20 : FWD to VMIB timer - PGM113 added below items .F12 : Call Cutoff Timer .F13 : Barge in Mode .F14:Auto FWD VMIB -6- Issue 3.7.3 - ipLDK PC Admin. .F15 Station Port Block - PGM231 added below type Sta VM Box was added type, - PGM135 Offnet FWD Btn Assigned - PGM 204 Local Code Table added - PGM146 added below items. .F7 : R2 Collect Call .F8 : Collect Make Timer .F9 : Collect Break Time - PGM186 added below item. .F20 : DCO Gain - PGM236 added below types .F5 : Mobile hunt call .F6 : Voice MSG wait noise to mobile - PGM160 add below item. .F20 : CUT ISDN overlap dial noise - PGM417/418 added .F417 : SMSB Rx Gain .F418 : SMSB Tx Gain - PGM143 added below item .F13 : ISDN ECT - PGM155 added below items .F3 : DCO IP Address .F4 : DCO Gateway Address .F5 : DCO Server IP .F6 : Master/Clock - PGM160-F16 CO-CO Xfer CPT Detection was moved to PGM142-F18 - SIP Name Service was added in Attribute I. - SMS Rx Gain from DCO was added - SMS Tx Gain to DCO was added - Mobile Extension Usage was added in PGM236-F7 - UCD Q info was added in PGM191 with UCD type hunt group - COS range was changed. (1-9 Æ 1~11) - Supplementary Service was added Issue 3.7.3 ISSUE 3.7.2 OCT/2006 MP : 3.7Aa PC :3.7Aa ISSUE 3.7.3 MAR/2007 MP : 3.7Ba PC : 3.7Ba -7- ipLDK PC Admin. - Issue 3.7.3 Contents – 12 12 12 13 16 17 17 18 18 20 20 22 23 1. GENERAL DESCRIPTION 1.1 INTRODUCTION TO IPLDK PC ADMIN 1.2 HARDWARE/SOFTWARE REQUIREMENTS 1.3 INSTALLATION OF IPLDK-PC ADMIN SOFTWARE 1.4 INFORMATION FOR CAPI2032.DLL(VERY IMPORTANT) 1.5 BRIEF OUTLINE OF PC ADMIN 1.6 PASSWORD 1.7 CONNECTION TYPE 1.8 SITE MANAGEMENT TOOL 1.9 BASIC INFORMATION 1.10 LEVEL MANAGEMENT – ADMINISTRATOR ONLY 1.11 USER MANAGEMENT – ADMINISTRATOR ONLY 1.12 IPLDK UTILITIES 2. PRE-PROGRAMMED 2.1 LOCATION INFORMATION (PGM 100) 2.2 SLOT ASSIGNMENT (PGM 101) 2.3 WTIB PORT NUMBER ASSIGN (PGM 102) 2.4 LOGICAL SLOT ASSIGNMENT (PGM 103) 2.5 NUMBERING PLAN TYPE (PGM 104/105/106/107/109) 2.6 IP SETTING (PGM 108) 2.7 BOARD ATTRIBUTES (PGM 155) – NOT AVAILABLE WITH IPLDK20 25 25 26 29 29 31 33 34 3. STATION BASE PROGRAM STATION ID ASSIGNMENT (PGM 110/111/112/113/114) 3.2 FLEX BUTTONS ASSIGNMENT (PGM 115) STATION COS (PGM 116) 3.4 CO GROUP ACCESS STATION (PGM 117) 3.5 INTERNAL PAGE ZONE ACCESS (PGM 118) 3.6 CONFERENCE PAGE ZONE (PGM 119) 3.7 ICM TENANCY GROUP (PGM 120) 3.8 PRESET CALL FORWARD (PGM 121) 3.9 HOT/WARM LINE SELECTION (PGM 122) 3.10 CTI ATTRIBUTE (PGM 123) – NOT AVAILABLE WITH IPLDK20 3.11 SMDR ACCOUNT GROUP (PGM 124) 3.12 COPY DSS BUTTON (PGM 125) 3.13 DISPLAY STATION WITH COS (PGM 130) 3.15 CO GROUP ACCESS STATION (PGM 131) 3.16 STATION IP LIST FOR CTI – AVAILABLE WITH ONLY IPLDK20 3.14 HOT DESK ATTRIBUTE (PGM 250) 3.15 OFF-NET FWD BUTTON ASSIGN(PGM 135) 36 36 42 44 46 47 47 48 49 49 50 51 52 53 53 53 54 54 4. CO LINE BASE PROGRAM -8- 56 ipLDK PC Admin. 4.1 RELATED ADMIN (PGM 140/141/142/143/146/147) 4.2 CO RING ASSIGNMENT (PGM 144/145) 4.3 AC15 CO LINE ATTRIBUTES (PGM 149) – NOT AVAILABLE WITH IPLDK20 4.4 SMS ATTRIBUTES (PGM292) Issue 3.7.3 56 62 63 63 5. SYSTEM BASE PROGRAM 5.1 SYSTEM ATTRIBUTES (PGM 160/161/163) 5.2 ADMIN PASSWORD (PGM 162) 5.3 ATTENDANT ASSIGNMENT AND DVU ANNC.#(PGM 164/165) 5.4 CO-TO-CO COS (PGM 166) 5.5 DID/DISA DESTINATION (PGM 167) 5.6 EXTERNAL CONTROL CONTACT (PGM 168) 5.7 LCD DATA/TIME/LANGUAGE DISPLAY MODE (PGM 169) 5.8 MODEM (PGM 170) 5.9 MUSIC (PGM 171) 5.10 PBX ACCESS CODE (PGM 172) 5.11 PLA(PREFERRED LINE ANSWER) PRIORITY (PGM 173) 5.12 RS-232C PORT SETTING (PGM 174) 5.13 PRINT SERIAL PORT SELECTION (PGM 175) 5.14 PULSE DIAL / SPEED RATIO (PGM 176) 5.15 SMDR ATTRIBUTES (PGM 177) 5.16 SYSTEM DATE / TIME (PGM 178) 5.17 LINKED STATION PAIRS TABLE (PGM 179) 5.18 SYSTEM TIMERS I – III (PGM 180, 181,182) 5.19 CIDU SETTING (PGM 185) 5.20 DCOB SYSTEM ATTRIBUTES (PGM 186) 5.21 DCOB CO LINE ATTRIBUTES (PGM187) 5.22 IN ROOM INDICATION (PGM 183, FROM V3.5) 5.24 CHIME BELL ATTRIBUTE (PGM 184, FROM V3.5) 5.25 SMS ATTRIBUTES (PGM 290,291, FROM V3.7) 65 65 68 68 69 70 71 72 72 73 75 76 76 78 79 80 82 82 83 88 89 91 91 93 93 6. STATION GROUP 6.1 STATION GROUP ASSIGN (PGM 190/191) 95 95 7. ISDN SYSTEM BASE PROGRAM 7.1 ISDN ATTRIBUTES (PGM 200) 7.2 COLP TABLE (PGM 201) 7.3 MSN TABLE (PGM 202) 7.4 ISDN SYSTEM ATTRIBUTE (PGM 203) – IPLDK 20 ONLY 102 102 103 103 105 8. TABLES 8.1 LCR ASSIGNMENT (PGM 220) - (EXCEPT AUS_TELSTRA) 8.2 LCR - LDT(LEADING DIGIT TABLE) TABLE (PGM 221) – (EXCEPT AUS_TELSTRA) 8.3 LCR - DMT TABLE (PGM 222) - (EXCEPT AUS_TELSTRA) 8.4 LCR TABLE INITIALIZATION (PGM 223) - (EXCEPT AUS_TELSTRA) -9- 107 107 108 109 111 ipLDK PC Admin. 8.5 TOLL EXCEPTION (PGM 224) 8.6 CANNED TOLL TABLE (PGM 225) 8.7 EMERGENCY CODE TABLE (PGM 226) 8.8 AUTHORIZATION CODE TABLE (PGM 227) 8.9 CUSTOMER CALL ROUTING (PGM 228) 8.10 EXECUTIVE/SECRETARY TABLE (PGM 229) 8.11 DID DIGIT CONVERSION TABLE (PGM 230) – NOT USED…. 8.12 FLEXIBLE DID TABLE (PGM 231) 8.13 SYSTEM SPEED ZONE (PGM 232) 8.14 WEEKLY TIME TABLE (PGM 233) 8.15 VOICE-MAIL DIALING TABLE (PGM 234) 8.16 TIE ROUTING TABLE (PGM 235) 8.17 MOBILE EXTENSION TABLE (PGM 236) – (FROM V3) Issue 3.7.3 111 113 114 115 117 119 119 120 123 125 125 127 128 9. HOTEL PROGRAMMING 9.1 HOTEL ATTRIBUTES SETTING (PGM 300) 9.2 HOTEL ROOM ATTRIBUTES SETTING (PGM 301) 9.3 HOTEL ROOM SERVICE STATION (PGM 302) 9.4 CLASS OF ROOM (PGM 303) 9.5 ATTRIBUTES OF ROOM RATE (PGM 304) 9.6 ATTRIBUTES OF CALL CHARGE RATE (PGM 305) 9.7 BAR PRODUCT NAME (PGM 306) 9.8 TAX RATE (PGM 307) 9.9 FEE FOR PART TIME (PGM 308) 129 129 130 130 130 131 132 133 134 134 10. VOIB PROGRAMING 10.1 VOIB PROGRAMMING (PGM 340) – IPLDK20 IS AVAILABLE FROM V2.1AA. 10.2 GATE KEEPER PROGRAMMING (PGM 341, FROM V3.5) 10.3 SIP ATTRIBUTES 1,2 (FROM V3.6) 135 135 135 136 137 11. NETWORKING PROGRAMMING 11.1 NETWORKING ATTRIBUTES (PGM 320/PGM321) 11.2 NETWORKING CO LINE ATTRIBUTE (PGM 322) 11.3 NETWORKING BASIC ATTRIBUTE (PGM 324) 139 139 140 141 12. RSG/IP PHONE PROGRAMMING – FROM V3, IPLDK20 IS AVAILABLE FROM V2.1AA 143 12.1 VOIB SLOT ASSIGNMENT FOR RSG/IP PHONE (PGM 380) 12.2 RSG/IP PHONE PORT NUMBER ASSIGNMENT (PGM 381) 12.3 RSG / IP PHONE ATTRIBUTE (PGM 382) 12.4 RSG ATTRIBUTE (PGM 383/384) 12.5 RSG ALARM ASSIGNMENT (PGM 385) 12.6 IP PHONE ATTRIBUTE (PGM 386) 12.7 RSG RX GAIN CONTROL (PGM 390/392/394/396) - 10 - 143 143 144 145 147 148 149 ipLDK PC Admin. 12.8 RSG TX GAIN CONTROL (PGM 391/393/395/397) Issue 3.7.3 149 13. NATION SPECIFIC 13.1 DTIB RX GAIN CONTROL (PGM 400) 13.2 SLIB RX GAIN CONTROL (PGM 401) 13.3 SLIB12 RX GAIN CONTROL (PGM 402) 13.4 WTIB RX GAIN CONTROL (PGM 403) 13.5 ACOB RX GAIN CONTROL (PGM 404) 13.6 ACOB8 RX GAIN CONTROL (PGM 405) 13.7 DCOB RX GAIN CONTROL (PGM 406) 13.8 VMIB RX GAIN CONTROL (PGM 407) 13.9 DTRU RX GAIN CONTROL (PGM 408) 13.10 EXT PAGE RX GAIN CONTROL (PGM 409) 13.11 CPTU RX GAIN CONTROL (PGM 410) 13.12 MODU RX GAIN CONTROL (PGM 411) 13.13 OTHER GAIN TABLE 13.14 SYSTEM TONE FREQUENCY (PGM 420) 13.15 DIFFERENTIAL RING FREQUENCY (PGM 421) 13.16 DISTINCT CO RING FREQUENCY (PGM 422) 13.17 ACNR TONE CADENCE (PGM 423) 150 150 150 150 150 150 150 150 150 150 150 150 150 151 152 153 154 155 14. INITIALIZATION(DB INIT) 15. PRINT DATABASE 15.1 FLEXIBLE NUMBERING PLAN PRINT (PGM 451) 156 157 157 APPENDIX. SUPPLEMENTARY SERVICE A. DECT REGISTRATION B. STATION SUPPLEMENTARY SETTING 158 158 159 - 11 - ipLDK PC Admin. 1. General Description 1.1 Introduction to ipLDK PC Admin z Issue 3.7.3 ipLDK PC Admin performs the Admin function on your PC instead of keysets so that you can manage the functions more conveniently. It performs all the function of keysets, and runs on Window NT/2000/XP. 1.2 Hardware/Software Requirements 1. ipLDK z z z z z ipLDK MPB Software preliminary version Serial Port that is installed on MPB as a basic option (Basic Serial Port) Password for using PC Admin should be set in MPB One IP Address should be set in MPB for LAN Connection. If you don’t know the exact IP address, ask your network administration Available system : ipLDK-300/100/300E/20 Office/Hotel(Except ipLDK20) system. 2. PC Pentium Celleron 233MHz CPU or higher(Celleron 333 or more high performance CPU is recommended) 256 color Super VGA (800 X 600), or higher(Recommended : 1024 X 768) One or more Serial Port: Mouse that has two or more buttons At least 64MB RAM (128MB or more RAM is recommended) MS-Windows NT/2000/XP NIC(Network Interface Card) for LAN connection and ability to connect the network(Option) ISDN Card for ISDN Connection (Option) MODEM for PSTN connection (Option) 3. Cable RS-232C Type Cable for connecting PC and ipLDK system: Two connectors are needed for this connection. One connector should be a 9-pin female connector that is to be connected to ipLDK, and the other one should fit the serial port of the PC. There are three required lines that should be connected for the communication between PC and ipLDK system: Ground-Ground, Transmit-Transmit, and Receive-Receive. - 12 - z z z z z z z z z ipLDK PC Admin. z Issue 3.7.3 RS-232C Type Cable for connecting PC and the system to be routed: There are three required lines that should be connected between PC and the system to be routed: Ground-Ground, Transmit-Receive, and Receive-Transmit. z UTP cable is used for LAN connection. ISDN Connection Cable z 4. Environments for LAN connection z z ipLDK system should have one IP address and it has to be set in MPB using Admin PGM108 – Flex button 2. If your site uses the firewall or NAT(Network Address Translation)/PAT(Port Address Translation) for security, you have to need help from network administrator to use the PC Admin software for remote access from outside. z If you don’t remember above information, you would not connect the ipLDK system from outside using PC Admin via Internet. 1.3 Installation of ipLDK-PC Admin Software z z z Put the CD-ROM into your PC or run setup.exe file. Run Explorer in your PC and search setup.exe in the CD-ROM of first floppy diskette. If you find the setup.exe file, execute “setup.exe”. Then you can find the initial screen of installation of PC Admin as like below.(It is not needed for user to explore your computer if you get this software as files. - 13 - ipLDK PC Admin. Issue 3.7.3 [Figure 1-1] Start Screen z z Press [Next] for install process. If you press [Cancel] button, install process will be stopped. Next step is selecting location for installation. [Figure 1-2] Select install directory z z You can change the install directory if you want. Default install directory is like below. Next step is displayed below. - 14 - ipLDK PC Admin. Issue 3.7.3 [Figure 1-3] Display the user information z z z z Next step will copy the files into install directory that you have decided previous step. After coping the files. Next step is the final step to complete the installation. Below screen is the final step for installation. [Figure 1-4] Finish notification screen - 15 - ipLDK PC Admin. z Now, you can use PC admin software. Issue 3.7.3 1.4 information for CAPI2032.DLL(Very Important) In this section, we will explain the information about CAPI2032.DLL when you use ISDN connection. This information is very important. So, you should keep in your mind this information. There are two possible cases. 1) ISDN S-Card Driver Installation Æ PC Admin Installation In this case, you can use the PC Admin software with no problem. When you install the ISDN S-Card drivers into your computer, ISDN S-Card driver installation wizard will copy the correct CAPI2032.DLL into c:\\windows\\system directory. And, after that, you may install the PC Admin software. At that time, PC Admin installation wizard will check whether the correct CAPI2032.DLL is installed or not. Because you installed the ISDN SCard drivers before installing PC Admin, PC Admin installation wizard will not copy default CAPI2032.DLL into installation directory.(Default c:\\program files\\lge\\PC Admin for ipLDK directory). So, when you finished the installation of PC Admin software, you can find CAPI2032.DLL in the c:\\windows\\system directory instead of PC Admin installation directory(c:\\program files\\lge\\PC Admin for ipLDK). PC Admin will use the CAPI2032.DLL file in the c:\\windows\\system directory. 2) PC Admin Installation Æ ISDN S-Card Driver Installation In this case, you should make some change after installing ISDN S-Card driver installation. When you install the PC Admin software without ISDN S-Card installation, PC Admin installation wizard will copy default CAPI2032.DLL file into installation directory(default c:\\program files\\lge\\PC Admin for ipLDK) for temporary usage. But in this case(default CAPI2032.DLL in the installation directory), you can’t use ISDN connection. - After installing the PC Admin, you may install ISDN S-Card Drivers to use ISDN connection. If you install the ISDN S-Card drivers, ISDN S-Card installation wizard will copy the correct CAPI2032.DLL into c:\\windows\\system directory. This CAPI2032.DLL is - 16 - ipLDK PC Admin. Issue 3.7.3 the correct library file with your ISDN S-Card. So, default CAPI2032.DLL in the PC Admin installation directory(c:\\program files\\lge\\PC Admin for ipLDK) is not needed from this time. Because default file will not be worked with your ISDN S-Card. - So, after you installed your ISDN S-Card drivers, you should delete the temporary CAPI2032.DLL in PC Admin installation directory.(CAPI2032.DLL in c:\\program files\\lge\\PC Admin for ipLDK directory). Otherwise, you can’t use the PC Admin with ISDN connection. - Delete CAPI2032.DLL file in the PC Admin directory(c:\\program files\\lge\\PC Admin for ipLDK) after installing ISDN S-Card drivers. Keep this information in your mind.!! 3) Recommended procedure - So, we recommend the 1st case(ISDN S-Card installation Æ PC Admin installation) procedure. - If you choose the 2nd case, you should follow the above instruction to use ISDN connection. 1.5 Brief Outline of PC Admin z This program has a simple menu such as connection and disconnection to the system, Reload, and Debugging Window. items. z All of admin program is structured in a tree shape. It has 14 upper items excluding Hotel, Networking, VoIP. Each of them has its lower A related program appears at the right side of the tree as you click on an item. Each upper item is implemented on a dialog box that has tabs to classify the lower items. The PC Admin detects the category of ipLDK system automatically, and controls the available feature. For example, if the ipLDK system is ipLDK-300 Office system, PC admin will disable to programming Hotel feature. z It is possible to use for all ipLDK systems except NeXer. WEB Admin maintains NeXer. 1.6 Password As you execute ipLDK PC Admin application, you will see the box below to enter a user Id and password. You should assign the user ID, access level and password for each engineer. This password is not related with PGM162. This is a multi level management for user and it is the pure feature of only PC Admin. (Default ID : administrator , Password : 0000 ) - 17 - ipLDK PC Admin. Operation Issue 3.7.3 1. When you execute PCADM software, you will see the below logon dialog box. You should enter the user ID and password and this information will be programmed only when you logon with administrator. Administrator has highest priority and level. So, only administrator can program the user ID and password. 2. User should enter the user name and password whenever they want to logon. But if user uses the same ID, user can enable the User ID Save field. Then user don’t need to enter the user name again. But if another user want to logon, he/she should enter his/her own user ID. 3. Press the [OK] button after entering user ID and password. 4. Follow the instruction in Connection Type Setup. It will be described in next section. [Figure 1-5] Password Input Window 1.7 Connection Type From V3.0, PC Admin supports LAN and serial connection directly. Because ipLDK system uses PPP connection, PC Admin can be connected with PPP from your PC. And PC Admin uses the small program to manage connection separately. This connection manager is not done by itself. This module transfers data between GUI and MPB software. 1.8 Site Management tool PC Admin can save simple information for sites and you can connect to the site directly with this list. So, if you save site information, it will be very helpful to you. Operation 1) [Tools] → [Site Information] Then you will see the below window. - 18 - ipLDK PC Admin. Issue 3.7.3 [Figure 1-6] Site Information Window 2) Press [New] button to add site information. Then you will see small dialog box for each information with below order. Site Name / IP Address / ISDN Phone number / Modem phone number / Location / Telephone number for customer / Install Date / Last Upgrade Date. 3) telephone number for customer, install data and last upgrade date are for additional information for engineer.. - After setting each field, press [Save] button to save changes. - To connect some site, move the mouse to the site that you want to connect and click right button of mouse. Then you will see below selection menu. [Figure 1-7] Selecting connection type 4) With this selection, you can select the type of connection. - You can use the “Get Information (From current connected site)” to save basic configuration of the site. If you select this menu during your connection, PCADM will read the basic slot configuration and will save the data. If you save this data, you can - 19 - ipLDK PC Admin. see this information without connecting to the site. Issue 3.7.3 2)[File] → [Connect] - This menu is for fast connection to the site that you have visited before. - If you select this menu, PCADM software can remember the type of connection and connection number(IP address or telephone number). So, if you want to connect again the last visited site, select this menu instead of selecting site information. - Then you can make fast connection. 1.9 Basic information - Connect LED If connection is established between PC Admin and ipLDK system, connect light will be turned on with LED. The Tool Bar shows all the menu items including connection and disconnection to the system, Reload, Debug Window, and Item Window. - Tx/Rx LED This LED will be turned on when PCADM send or receive data from ipLDK system. - Nation Code and Site name This information will be displayed when connection is established between PC Admin and ipLDK system. 1.10 Level management – Administrator only A. Description and how to program PC Admin supports multi level of users. Administrator has highest priority and can assign levels to each user. Refer to below description for level management. 1) [Tools] → [Level Management] z z z z Then you will see below window for level management. (Only administrator can see this window. Other user can not see this menu in menu bar) Press [New] button to assign new level Enter the level that you want to add. At this time, duplicated level is not allowed. After entering level, you can select the features that you want to disable with assigned level. If you disable some menu, the user who has this level can not see the menu in menu list. z It is possible to select the menu by medium category. ( For example, PGM108,111,141 etc). You cannot assign the main category as like “Preprogrammed” or “Station Base programming”. - 20 - ipLDK PC Admin. z z After configuration, you should press [save] button to save changes. Only “administrator” can control the level management. Issue 3.7.3 2) [All clear] will be used when you want to clear the whole level data. 3)[Delete] can be used when you want to delete one. [Figure 1-8] Level management B. Tip for backup level database If you want to back up or assign the defined level to every customer site, refer to below description. z z z To backup and restore the level database, search two files. One is Lmaster.cds and another is Ldetail.cds in installation directory. If you backup these two files, it will be very helpful for emergency case. Case 1 : When you want restore the database after installing the PCADM again. - 21 - ipLDK PC Admin. z Issue 3.7.3 Case 2 : When you want to setup the same level data to various customer. In other words, you can fix several levels and apply this configuration to all customer. Refer to below instruction. - Install the PCADM software in some PC and configure the level/menu with a few level. - Backup the Lmaster.cds and Ldetail.cds to your mobile storage (Ex:Floppy Diskette, USB-memory, CD-ROM for your working, etc) - If you go to the site to install PCADM, install the PCADM package. - After installation, copy your preprogrammed DB file(Lmaster.cds and Ldetail.cds) to installation directory(Default : C:\\Program files\\LG Electronics\\ipLDK PCADM\\Data). Then these two files will be overwritten and user can use the PCADM with fixed level information that you have programmed. C. So, you don’t need to program for level information whenever you install the PCADM package with this tips. If you keep this backup or preprogrammed file, you can copy these files easily. 1.11 User management – Administrator only Description and how to program PC Admin supports multiple users with different level. When you want to add or modify the user information, refer to below description. 1) [Tools] → [User Management] z z z z Then you will see below window for level management. (Only administrator can see this window. Other user can not see this menu in menu bar) Press [New] button to add user. Then you will see some dialog box with below order. Æ User Name / Password / Level After entering above 3 items, you should press [Save] button to save changes. Only “administrator” can control the user management. So, this menu will be displayed only for administrator. - 22 - ipLDK PC Admin. Issue 3.7.3 [Figure 1-9] User management Tip for backup and restore user database If you want to back up or assign the defined level to every customer site, refer to below description. To backup and restore the level database, search two files. The name of file is attribute.cds. z If you backup this file, it will be very helpful for emergency case. Summary If you want to backup the data for level and user, backup the three files Æ Lmaster.cds, Ldetail.cds, Attribute.cds 1.12 ipLDK Utilities Description and how to program PC Admin includes some utilities. User can download the database of MPB using this utility. Detail information is described in user guide. In this section, some information will be explained for connection type. Included Utilities z z z z ipLDK DB download / Upload software ipLDK remote upgrade software. ipLDK Remote diagnostic software ipLDK Speed editor Other utilities are linked with PC Admin software directly because they have strong relation ship with PCADM. So, user just selects the menu to use them. But Speed Editor has different characteristic. Some user doesn’t want to use this utility and some user want to use it. So. ipLDK PC Admin supports option for this speed editor. If user want to link speed editor with - 23 - ipLDK PC Admin. Issue 3.7.3 PCADM, select [ipLDK Utility] Æ [ipLDK Speed Editor Path] to link program. Then you can link the path of which speed editor was installed. After assigning path, you just select the menu [ipLDK Utility] Æ [ipLDK Speed Editor] to run the software. If user want to change the path, use the [ipLDK Utility] Æ [ipLDK Speed Editor Path] menu again. How to upgrade these utilities? - Only speed editor will be released alone. So, if speed editor is released for update, you just overwrite the new one with old one. Then user can use updated speed editor without additional configuration. But in case of other three utilizes, they will be released with PCADM package normally. But in some special case, each software may be released one by one. (This is very special case and you don’t need afraid for this case.) Though each software may be released, you just copy the new one with old one. - 24 - ipLDK PC Admin. 2. Pre-Programmed Issue 3.7.3 The ipLDK system is operated by default values when you first install the system. on. You can change these values such as Location Information, Slot Assignment, Numbering Plan and so Pre-Programmed items are from PGM 100 to PGM 108 as the picture shows below. Click on a lower item to program the specified function. [Figure 2-1] Pre-Programmed Menu list 2.1 Location Information (PGM 100) Set up the Nation Code and Customer Site Name. Name code is the same as long distance telephone code. And the site name is the name of your site. This information will be displayed menu title bar automatically when you connected to ipLDK system. [Figure 2-2] Mainframe window for basic information Operation 1. Click [Location Information]. Then you can find the small window like below. - 25 - ipLDK PC Admin. Issue 3.7.3 2. 3. 4. 5. [Figure 2-3] Location Information Setting Window Korea is the default value of Nation Code. You can change the code. Before changing Nation Code, you should check the DB Protected by DIP8(4:ipLDK20). If DB Protected is enabled, nation code will not be changed. After changing the nation code, you have to reset the system. At that time Dip S/W 8 should be located for database protected. You can put any name in [Customer Site Name] box, up to 23 characters. Both characters and number are available. And you can enter lowercase characters. 2.2 Slot Assignment (PGM 101) ipLDK system supports max 54(ipLDK300E)/27(ipLDK300)/12(ipLDK100) slots with 6(ipLDK300E) / 3(ipLDK300)/2(ipLDK100) lacks. (This screen will not be displayed when you are connecting to ipLDK20 system.) This program assigns each slot to one type of the boards. Slot Assignment is possible by the system automatically, or by the PC Admin program manually. If the Dipswitch is off, the system automatically senses the board. If the Dipswitch is on, you have to assign each board to which slot it is placed. And reset the system. The PC Admin software shows the same shape GUI type for slot configuration. Below is the example of ipLDK-300E system. - 26 - ipLDK PC Admin. Issue 3.7.3 [Figure 2-4] Configuration Window(Ex:ipLDK300E) Operation 1. Click [Configuration] with popup menu. Then you can find the small window like above. The window is GUI type and will be displayed with correct slot number automatically. 2. With this window, you can add/delete slots by GUI screen and mouse operation. If you want to add or delete slot, click right button of mouse. Then you will see sub menu like below. - 27 - ipLDK PC Admin. Issue 3.7.3 [Figure 2-5] Rack Slot Assignment Setting Window 3. The dialog above shows DSIB is installed in slot 1, which is sensed automatically. you want to assign manually, you choose one of the slots, and a board type. 4. When you use this feature, you can’t modify the logical port number except PRIB. 5. When you assign the PRIB, you can select the logical port number that you want. But it has range from 0 to 30 ports. 6. Any board except PRIB has fixed logical port number. But there is one exception. In the case of WTIB, you can only read the logical port number from 8 to 192 ports that you have entered at PGM 103. 7. And if you want to see attribute of installed slot, you can select the “View” menu in above window. 8. From V3.0Ba, When user select [Empty board] confirmation window will be displayed and will ask once more avoiding mistake. If - 28 - ipLDK PC Admin. 2.3 WTIB Port number Assign (PGM 102) Issue 3.7.3 It decides the number of DECT Handset port number that could be used in the system. It should be multiple of 8 ports. In other words, 8, 16, ……, 64, 72, ….. to max 192(ipLDK300/600) / 80 (ipLDK100) You can configure WTIB port with the [port setting] menu in slot configuration screen. This feature is available from V3.7Ca in case of ipLDK-20. Operation 1. Select the WTIB slot in configuration window. 2. Click [Port Setting]. Then you will see the port information with another small dialog box. With that window, you can select the port that you want to install. 3. You can register up to 192(ipLDK300/600) / 80(ipLDK100) DECT handset. (The number is always a multiple of 8) 4. It is available via combo box list. So, you have to do select the number in the list and press the Apply button. 5. In this feature, you can’t edit the port number. It is fixed values. 2.4 Logical Slot Assignment (PGM 103) It sets up COL Board, STA Board and VMIB. Same as Rack Slot Assignment, COL If Dipswitch is off, But in case of setting up VMIB, it Board and STA Board is assignable either automatically or manually. it will be assigned automatically, otherwise manually. will be assignable only manually regardless of the dipswitch status. Operation 1. Select the [Logical Assignment] in Rack Slot Assignment Setting Window (Figure 2-31). box. 2. Add the slot to location if right side. If you select the Station board, you should enter the slot to station window. 3. If you want to change the order of slots, use [Up] and [Down] button to change the order of the boards - 29 - If any board is preset automatically by the system, it shows the boards on the dialog ipLDK PC Admin. 4. After editing, press [Update] button to save change values. Issue 3.7.3 5. If you want to remove it, select a slot number below COL board, STA board, or VMIB and click the button [ << ]. 6. In the case of STIB, if you select STIB slot into any type of COL/STA type, it will be added in the other slot type. For example, suppose that you have selected a STIB slot in COL board type, the PC Admin software will add the STIB slot in STA board type automatically. 7. In the case of VOIBE, if you select VOIBE slot into any type of COL/STA type, it will be added in the other slot type. For example, suppose that you have selected a VOIBE slot in COL board type, the PC Admin software will add the VOIBE slot in STA board type automatically.(From V3 only) [Figure 2-6] Logical Slot Assignment Setting Window in ipLDK300 ITEM COL Board STA Board DEFAULT REMARK DIP ON: Manually DIP OFF: Automatically DIP ON: Manually DIP OFF: Automatically - 30 - ipLDK PC Admin. VMIB DIP ON: Manually DIP OFF: Automatically [Table 2-1] Button Configuration for Slot Assignment (PGM 103) Issue 3.7.3 2.5 Numbering Plan Type (PGM 104/105/106/107/109) The default range of the station number is from 100 to 599(ipLDK300E) / 399(ipLDK300) / 227(ipLDK100) / 28(ipLDK20). You can change the range according to the nation or your style. But there is information that you have to remember. < NOTICE > If you change the numbering plan type when you are using the PC admin, you have to reload flexible number plan – Station number (PGM 105) information. If you don’t reload that information, you would find some misoperation in checking the range. Operation 1. Click [Numbering Plan] menu in left main menu. Then you will see the below screen. 2. With this window, you can program all kind of numbering plan. 3. User can change the station range from any position.(From PCADM V3) 4. From V3.0Ba, when user select [All Station Delete] confirmation window will be displayed and will ask once more avoiding mistake. - 31 - ipLDK PC Admin. Issue 3.7.3 [Figure 2-7] Numbering Plan type Setting Window 5. Look at the table below and change the Number Set Type. INTERCOM DEFAUL REMARK RANGE T Number Set Type 1 1000 – As the basic type, the 1st digit of 1599(ipLDK600) station number should be 1 – 4. 100 – 399(ipLDK300) Yes 100 – 227(ipLDK100) 10 – 37(ipLDK20) 1000 – 1599(ipLDK600) 100 – 399(ipLDK300) The station number can be changed Number Set Type 2 No 100 – within 799. 227(ipLDK100) (100 – 799) 10 – 37(ipLDK20) ITEM - 32 - ipLDK PC Admin. Issue 3.7.3 1000 – 1599(ipLDK600) 100 – Number Set Type 3 399(ipLDK300) No Australia Default 100 – 227(ipLDK100) 10 – 37(ipLDK20) 7000 – 7599(ipLDK600) 700 – 999(ipLDK300) Number Set Type 4 No New Zealand Default 700 – 827(ipLDK100) 700 – 727(ipLDK20) 2000 – 2599(ipLDK600) 200 – 499(ipLDK300) Number Set Type 5 No Italy Default 200 – 295(ipLDK100) 200 – 227(ipLDK20) 10 – 79 Max Station Ports:60 (ipLDK600/300/100 Number Set Type 6 No Station above max ports will be ) displayed ”***” 10 – 37(ipLDK20) 1000 – 1299(ipLDK600) 100 – Max Station Ports:200 299(ipLDK300) Number Set Type 7 No Station above max ports will be 100 – displayed ”***” 227(ipLDK100) 100 – 127(ipLDK20) 1000 – 1599(ipLDK600) 100 – 399(ipLDK300) The station number can be changed Number Set Type 8 No 100 – within 999. 227(ipLDK100) (100 – 999) 10 – 37(ipLDK20) [Table 2-2] Flexible Numbering Plan for ipLDK (PGM 104) 2.6 IP Setting (PGM 108) You must do IP Setting to transport data remotely through the network. - 33 - ipLDK PC Admin. Issue 3.7.3 Operation 1. Select [IP Setting]. Default values are displayed. 2. IP Name has no meaning at all. You put it within 15 characters. You can put the hostname if you want. But in that case, it is not real hostname.(Option) 3. Server IP Address is IP of ipLDK-300 system. IP address is assigned by network administrator. If you don’t want to use the network connection, you might skip this feature. But if you want to use network connection, you should config this feature. 4. Client CLI IP Address.(Option) 5. Gateway Address is the IP Address of the gateway that system uses. If you don’t enter the gateway’s IP Address, you can’t access the ipLDK-300 system from another LAN segment that separated by router or 3 layer switch. 6. Subnet Mask is set 255.255.255.0 as default value. [Figure 2-8] Network Setting Window < NOTICE > If your network uses firewall, NAT(Network Address Translation) or PAT(Port Address Translation), you should contact your network administrator. In that case, you can’t connect the ipLDK system using PC Admin software from remote site(not your network) without network administrator’s help. 2.7 Board Attributes (PGM 155) – Not available with ipLDK20 You can program the board attributes of equipped board Operation 1. [Configuration] Æ [Select slot] Æ [Board Attribute(R2 CRC Check)]. 2. If you select the slot number, then R2 CRC Check data will be displayed. 3. If selected board is not DCOB12, there will be displayed message box that says “The selected slot is not DCOB12.”. And there will not be displayed anything.(From PCADM 3.1Aa) - 34 - ipLDK PC Admin. Issue 3.7.3 - 35 - ipLDK PC Admin. 3. Station Base Program Use Station Base Program to change any station related function. enter the station range same as keyset admin. Issue 3.7.3 Station Base Program items are from PGM 110 to PGM 124. When you use station base program items, you should Station ID Assignment (PGM 110/111/112/113/114) This menu is related with assigning the phone type for each station. You can start the station main window for many programming. First, you should select the station list. With this window, you can select other menu as like station attribute or Flexible button assignment. Operation 1. Click [Station List]. [Figure 3-1] Station List Window 2. Click right button for other programming. 3. Select the menu that you want to change. Then you will see each different window for menu that you selected. 4. For example, below window displays station attribute I (PGM111). 5. [All Apply] can be used when you want to all update. - 36 - ipLDK PC Admin. Issue 3.7.3 6. [Name Data Save] can be used when you want to save. (‘Station Name’) 7. [Name Data Load] can be used when you want to load from saved file.( The file should be created by calling the [Name Data Save] feature ). [Figure 3-2] Station Attribute Display Window 8. You can see all attributes by pressing [STA Attr II], [STA Attr III], [STA ISDN Attr II] buttons for your purpose. And you can select the items that you want to see. 9. If you click right button of mouse, then you will see the view option window like below. If you want to see, check the check box in this window. Then PC Admin will display attributes that you have selected. 10. To edit the attribute, click the right button of mouse and select the [Edit] menu. Then you will see the edit window and you can edit the attributes. 11. After editing, press [Update] button for saving the changed values. - 37 - ipLDK PC Admin. Issue 3.7.3 [Figure 3-3] Station Attributes and view option window [Figure 3-4] Station Attributes and update window - 38 - ipLDK PC Admin. ITEM Auto Speaker Selection Call Forward DND Data Line Security Howling Tone to SLT ICM Box Signaling No Touch Answer Page Access Ring Type Speaker Ring Speaker Phone VMIB SLOT ICM Group Error Tone for Tad SLT Flash Drop RANGE ON/OFF ON/OFF ON/OFF ON/OFF ON/OFF ON/OFF ON/OFF ON/OFF 0–4 (1:S /2:H: /3:BOTH) ON/OFF 0-2 01-15 ON/OFF ON/OFF DEFAULT ON ON ON OFF ON OFF ON OFF 0 SPKR ON 0 01 OFF OFF OFF LIFO EN OFF 0 0 OFF 0~32 Issue 3.7.3 REMARK Allows accessing a CO line or place a DSS call by pressing appropriate {CO} or {DSS} button without lifting handset or pressing the [MON] button. Enables Call Forward to be activated by the sation. Enables DND to be activated by the station. The Allowance to protect from override and camp-on, when busy state. The allowance to give howling tone to SLT Allows receiving ICM box signal. The allowance to connect the transferred CO line automatically when station mode is H/P. Allows access to paging by the station. The station can give own ring type signal to another station in system through this field calling party centric. Station rings through Speaker or Headset or Both (speaker and headset) Operate with Speakerphone. Assign VMIB logical slot the stations use. Assign ICM Tenancy Group the stations belong In Answering machine instead of SLT, send Busy Tone In SLT, pressing [FLASH] Key or Hook Flashing will drop the CO Call Check Account Code at Loop LCR (Except AUS_TELSTRA) Priority to play VMIB message The possibility to enable/disable Off-net call forward Forced Handfree configuration (from V3) CIDSLT CAS Gain setting(0~20), Not used in ipLDK20 CIDSLT CAS Gain setting(0~20), Not used in ipLDK20 Caller Voice Over option(ON/OFF) from V3.2Aa from V2.1Aa in ipLDK20 Added from ipLDK V3.6, PCADM V3.6 Loop LCR Account ON/OFF Code VMIB Message Type FIFO/LIFO Off-net Call Forward EN/DIS Forced HF ON/OFF CIDSLT CAS Gain 0-20 CIDSLT FSK Gain 0-20 Caller V.Over SIP User Bin ON/OFF 00 [Table 3-1] Station Attribute I (PGM 111) ITEM Warning RANGE ON/OFF ON/OFF ON/OFF ENABLE /DSIABLE ENABLE /DSIABLE ENABLE /DSIABLE ENABLE /DSIABLE ON/OFF ENABLE /DSIABLE DEFAULT OFF OFF OFF ENABLE ENABLE DISABLE ENABLE OFF ENABLE REMARK The allowance to receive warning tone in order to remind the call elapse time in case of outgoing CO conversation. While on a CO line, the station user seizes another CO line by depressing the {CO} button. The first CO line goes on Hold automatically. (STA2:ON) If this flag is set to YES, station’s outgoing CO call may be disconnected when CO call restriction timer (PGM 180-BTN 17) is expired. The allowance to access individual CO line by dialing. The allowance of queuing for a busy CO/group of lines. Determines that each station user can program CO button or not. The allowance to answer calls by simply lifting handset or pressing [MON] button with the answering priority. The allowance to use Prepaid CO Call feature. (refer PGM180-Btn16) Allows access to system speed dial by the station. CO Tone Automatic Hold CO Call Time Restriction CO Line Access CO Queuing CO PGM PLA Prepaid Call Speed Dial Access Line - 39 - ipLDK PC Admin. Two Record Way ON/OFF ON/OFF EXT/ALL OFF OFF ALL Fax Mode Offnet Call Mode Issue 3.7.3 During Incoming or Outgoing Call, user can record two way voice. In Fax mode, Single ring and No Attendant Recall ALL : Internal Offnet Call Fwd and External Offnet Call Fwd are allowed. EXT: External Offnet Call Fwd is only allowed When DID/DISA call destination is STA, ON: ring to UCD Grp which the station belongs to. OFF: ring to the station. When DID/DISA call destination is STA, ON: ring to Ring Grp which the station belongs to. OFF: ring to the station. Make Camp on Tone not to be heard. Line Lengh . (TELKOM only) (From MPB 2.0As, PC ADM : 2.0Ba) Scroll speed when a broadcasting message is displayed. (Only for LKD-30DH, Korea only) To prevent unattended recalling, 1st CO line will be disconnected if SLT seize 2’nd CO line with FLASH. Internal RST Station authentication check(SA Only) CID Type check (from V3) Door open enable (from V3) Dummy Station Usage(from V3) Italy Request, V3.6 UCD Service Ring Service Grp Grp ON/OFF ON/OFF ON/OFF SHORT / LONG / FAR 0–7 ON/OFF ON/OFF ON/OFF ON/OFF ON/OFF ON/OFF ON/OFF OFF OFF OFF SHORT 3 OFF OFF OFF OFF OFF OFF OFF Stop Camp On Tone Line Length MSG SCRL SPD Block Back Call I-Time RST Stn Auth Chk CID Type 2 Door Open Dummy Stn Emergency Supervisor [Table 3-2] Station Attribute II (PGM 112) ITEM ADMIN VMIB Access Group Listening RANGE ENABLE /DSIABLE ENABLE /DSIABLE ENABLE /DSIABLE DEFAULT DISABLE DISABLE DISABLE REMARK The allowance the station to program Admin Database. This feature is available at only DKTU. (STA_100 : Enable) The allowance to access Digital Voice Unit. The allowance to use group listening (While you are talking on handset, by pressing the [MON] button, other persons around you may hear the conversation through the speaker of the key telephone). The allowance to override CO line to gain access to the conversation. The allowance to hide CO dialing number on SMDR printing. The allowance to use Voice Over feature This field is determined that Warm Line(OFF) or Hot Line(ON) in PGM 122. The allowance to use VMIB MSG Password attributes The allowance to use VMIB MSG Alarm MISB(ipLDK-300) Alarm MPB(ipLDK-100) Alarm RAU 1(ipLDK-300) Alarm MISB(ipLDK-100) Override Privilege SMDR Hidden Dialed Digits Voice Over Warm Line VMIB MSG Password VMIB MSG Date/Time ALARM Attribute ENABLE /DSIABLE ENABLE /DSIABLE ENABLE /DSIABLE HOT/WRM ON/OFF ON/OFF Flex BTN 1 ON/OFF Flex BTN 2 ON/OFF DISABLE DISABLE DISABLE WARM OFF ON OFF OFF - 40 - ipLDK PC Admin. Mute Ring Service Call Cut Off Timer Barge In Mode Flex BTN 3 ON/OFF ON/OFF ON/OFF 02(OFF/Monitor/S peech) OFF OFF ON 0(OFF) Alarm RAU 2(Only for ipLDK-300) Issue 3.7.3 Mute Ring Service configuration.(From V3.5) If the timer is expired, call is released and user hears disconnect tone.(from V3.7) Monitor Mode: The intruding extension can listen to the existing conversation but cannot participate. Speech Mode: The intruding extension can listen to and join to the existing conversation. (from V3.7) (from V3.7) If this value is set to ON, station is blocked so it’s impossible to use that station. (from V3.7) Auto Forward to VMIB Station Port Block ON/OFF Enable/Disable ON Disable [Table 3-3] Station Attribute III (PGM 113) ITEM CLIP LCD DISPLAY COLP LCD DISPLAY RANGE ON/OFF ON/OFF DEFAULT ON OFF REMARK This field is determined that a station display CLIP or not. This field is determined that a station display COLP or not. To Select Original CLI or Redirected CLI. ON: Original CLI, OFF: Redirected CLI This field is determined that a station receive CO message wait or not. ON:YES, OFF:NO EXT or CO ATD ATD/EXT KEYPAD /DTMF LONG /SHORT EXT To Select EXT(extension number) or CO ATD to make outgoing CLI or COLP information This field determines that ISDN station sends digit in DTMF or keypad facility after connected. This field determines that ISDN station acts in Short passive mode or not.. This field indicates how the CPN IE is filled in SETUP message. 0: Do not sent CPN(Called Party Number) to S0. In this case, all S0 STA of the S port will be ringing. 1: Send station number as CPN 2: Bypass the CPN from the network. (In the case of 1 & 2, only one specific STA will be ringing) CLI / REDIRECT DISPLAY RED/CLI CLI CLI MSG WAIT ON/OFF OFF KEYPAD FACILITY DTMF LONG/SHORT SHORT CPN TYPE 0-2 0 - 41 - ipLDK PC Admin. 0: Station sub-address not used. S0 SUB ADDRESS 0-2 0 1: Sub-address is filled in the CPN field of SETUP message. Issue 3.7.3 This field indicates how the sub-address used in SETUP message. 2: Sub-address is filled in the CPSN(Called Party Sub-address Number) field of SETUP. TEI Type AUTO/FIX ED FIXED To Select TEI Type Fixed, Automatic If this field is ON, the system check whether the received CLI is matched with the speed dial data or not. If they are matched, the speed dial name is displayed. If outgoing CLI is active and CLI type is EXT, this field used when make outgoing CLI. If this field ON and a SLT seize a ISDN line, the progress indication IE that indicates the originator is non-ISDN device is made in SETUP message. If this field is ON, does not send CLI Information and restrict PX send it. If this field is ON, does not send CLI Information and restrict PX send it. Restrict the DID Call New DID Call waiting indicate Long: Use station CLI with PGM114-BTN19. CLI Type LNG/SRT SRT (max 12) Short: Use station CLI with PGM114-BTN12 (max 4) Long Station CLI MSN Wait Long CLI 1 Max 12 digit ON/OFF Max 16 digit Max 16 digit Logical STA No. OFF Long ClI 1 If outgoing CLI is active and CLI type is EXT, this field used when making outgoing CLI. New virtual MSN call waiting enable. ipLDK:Added from V3.2Ab(MP), 3.2Aa(PC) ipLDK20 : Added from V2.1Aa(MP),3.2Ba(PC) Added from V3.2Ab(MP), 3.2Aa(PC) Long CLI 2 ipLDK20 : Added from V2.1Aa(MP),3.2Ba(PC) CLI NAME DISPLAY ON/OFF OFF ISDN CLI STA MAX 4 digit ON/OFF Logical STA No. OFF PROGRESS INDICATION ISDN CLIR ISDN COLR DID Restriction DID Call Wait ON/OFF ON/OFF ON/OFF ON/OFF OFF OFF OFF OFF Long CLI 2 [Table 3-4] ISDN Station Attributes (PGM 114) 3.2 Flex Buttons Assignment (PGM 115) This feature is to enable programming flexible button and copy feature(PGM 125). If you select the [Flexible button assignment] from popup menu, you can see the configuration window. Operation 1. Select [Flex Button Assignment]. - 42 - ipLDK PC Admin. 2. Click [Update] button to edit data. Issue 3.7.3 [Figure 3-5] Flexible button assignment Window 3. If you want to assign another function to a flex button, click on the flex button and click [Setting]. You will see the dialog below. [Figure 3-6] Flexible button assignment Window(Updating) 4. Refer to the table below, and select the type and data in the update tool. Pressing [Update], it displays the changed values. If the data is not in the range specified in the - 43 - ipLDK PC Admin. 5. 6. Issue 3.7.3 7. 8. table, you will see an error message. Before you enter the new value, you should check the whole data with Fig[3-4] window. The reason is to avoid entering duplicated value. [Auto Increment] means that user don’t need select next index. If this field is enabled and user press [Update] button, PCADM will increase the Flex button index automatically. So, user can continue the button PGM without moving cursor to next index.(From V3 Only) [Auto Copy] :If this field is enabled, user can copy of some button to another button without deleting and reprogramming same data. For example, suppose that BTN10 has station 1000 and user want to move this PGM to BTN 11. Then select Flex Button 10 and press [Update] button with enabled [Auto Copy]. Then PCADM and MPB will delete the Flex Button 10 and save same data in Flex Button 11. Duplication will be available with some PGM(Ex:Loop button) and some PGM will not be allowed because the decision is depend on MPB validation. [Auto Increment] and [Auto Copy] are exclusive. So, user can select only one at one time. Type ipLDK-300E RANGE ipLDK-300 ipLDK-100 ipLDK-20 User can program by button programming procedure. (empty) 001 – 400 01 – 72 1000 – 1599 001 – 200 01 – 72 100 – 399 11 – 99 00 – 99 2000 –6999 00 – 99 2000 –4999 Num Plan Code Net DSS number checked by MPB MSN Number is programmed by PGM202 When using Networking feature MSN Number that is registered in PGM202. 00 – 99 2000 –3499 Station Speed Bin System Speed Bin 01 – 40 01 – 24 100 – 227 01 – 12 01 – 08 10 – 37 CO Line CO Group Station No. REMARK No. 1 2 3 4 5 6 7 8 9 10 User Button {CO xx} Button {CO Grp xx} {LOOP} {STAxxxx} STA PGM Button {STA SPDxx} {SYS SPDxxxx} Num Pln Button Net DSS Button Loop Button 11 MSN Button [Table 3-5] Available Information for Flex Button Assignment Station COS (PGM 116) You can change COS(Class of Service) for each station. COS is from the 1st Class to the 11th class(From V3.7B, 9th class to V3.7A). All station COS for day and night operation is the 1st class as default. For a particular call, the CO COS is combined with station COS to determine restriction. - 44 - ipLDK PC Admin. Issue 3.7.3 Each station must be assigned a class of service which governs the station’s toll restriction 1for the day and night operation. The weekend COS is same as night COS. Operation 1. 2. Click [Display Station COS]. For day and Night you select a station COS, and press [Refresh] button. You can see the COS information about you have selected. [Figure 3-7] Station COS Assignment Window and update window. 3. 4. To update the COS level, select [update] button in popup menu. Then you see the below window for changing value. With this window, you can edit one station or station range. After entering the values, press [Update] button to save the changes. - 45 - ipLDK PC Admin. Issue 3.7.3 [Figure 3-8] Display Station COS 3.4 CO Group Access Station (PGM 117) You can divide the CO lines by group, and give a station an access to a specified CO line group. All stations can access any CO line as default. Operation 1. Click [CO Group Access Station] 2. This feature has same operation with Station COS. User can see the accessible group base station list. If user wants to see the stations which are accessible to group 1, select the 1 in group number and press [Refresh] button. Then stations that can access CO group 1 will be displayed. This feature is added from ipLDK V3. - 46 - ipLDK PC Admin. Issue 3.7.3 [Figure 3-9] CO Line Group Access Setting Window 3.5 Internal Page Zone Access (PGM 118) Each station can be assigned to internal paging zone. Yon can assign a station in a number of zones or no zone at all. If station is not in any internal zone, it will not receive any page announcement. In ipLDK-300/600 system it supports 30 internal paging zones and in ipLDK-100 system it supports 10 internal paging zones Operation 1. Click [Internal Page Zone Access]. 2. Select the page zone number and click [Refresh] button Then available station list will be displayed. 3. The other operation is same as CO Group Access feature. 3.6 Conference Page Zone (PGM 119) Each station can be assigned to a conference paging zone. Yon can assign a station in a number of zones or no zone at all. In ipLDK-600/300/100 system it supports total 5 conference paging zones. - 47 - ipLDK PC Admin. Issue 3.7.3 Operation 1. Click [Conference Page Zone]. 2. Select the conference page zone and click [Refresh] to see the station list that is able to access specified conference page zone. 3. The other operation is same as PGM 118. 3.7 ICM Tenancy Group (PGM 120) You may assign a station to a ICM Tenancy Group, and restrict ICM Tenancy Groups to call each other. And each ICM Tenancy Group can be assigned to a different attendant. In ipLDK-600/300 system, 15 ICM Tenancy Group may exist, so does attendant. Operation 1. Click [ICM Tenancy Group] then all ICM tenancy group information will be displayed in one screen. 2. Select an ICM Tenancy Group that you want to change and select [Update] button in pop menu. [Figure 3-10] ICM Tenancy Group Setting Window 3. Put an attendant station number for the ICM Tenancy Group you have just selected. 4. Click each ICM group check box that you want to access. 5. After all changes press [Update] button to save changes. - 48 - ipLDK PC Admin. 3.8 Preset Call Forward (PGM 121) Issue 3.7.3 If a station doesn’t respond to an outside call for a certain period of time, the call may be forwarded to another station. Operation 1. Click [Preset Call Forward]. Then programmed preset call forward pair will be displayed. 2. If there is no pair data, the window will not display anything. [Figure 3-11] Preset Call Forward Setting Window 3. To edit the preset forward pair, select [Update] menu in popup menu. 4. After entering all data, press [Update] button on Update Tool panel. 3.9 Hot/Warm Line Selection (PGM 122) This feature lets a station perform a pre-assigned feature as soon as lifting handset or pressing the [ON/OFF] button as if a station selects the feature (Hot Line). On the other hand, Idle Line Selection for a station which is assigned to warm line, is activated when takes no action for Warm Line Timer after lifting handset or pressing the [ON/OFF] button (Warm Line). Warm line is programmable at PGM 113. All stations are not assigned any Idle Line Selection by default. Operation 1. Click [Hot/Warm Line] then you will see the list of Hot/Warm line programming. 2. If there is no data, the table will display nothing. 3. Select the [Update] in popup menu to edit the data. - 49 - ipLDK PC Admin. Issue 3.7.3 [Figure 3-12] Hot/Warm Line Selection Setting Window 4. After setting data, press [Update] button for saving changes. ITEM Flex. BTN CO Line RANGE 01 – 48 001 – 400(ipLDK600) 001 – 200(ipLDK300) 01 – 40(ipLDK100/50) 01-16(ipLDK20) 01 – 72(ipLDK600/300) 01 – 24(ipLDK100/50) 01 – 08(ipLDK20) 1000 – 1599(ipLDK600) 100 – 399(ipLDK300) 100 – 227(ipLDK100/50) 10 – 37(ipLDK20) REMARK To activate a feature on a flex button as if pressed. To seize a CO Line CO Group To seize a CO Line Group Station To call an another station [Table 3-6] Available Information for Hot/Warn Line Selection in ipLDK 3.10 CTI Attribute (PGM 123) – Not available with ipLDK20 This menu will set up CTI attribute. Operation 1. Click [CTI Attribute]. 2. Click [Setting] and put a station range. It’s default values you see in the picture below. - 50 - ipLDK PC Admin. Issue 3.7.3 [Figure 3-13] CTI Station Attribute Setting Window 3. Select [CTI Station Mode] and ITEM CTI Station Mode CTI Station’s Baud Rate DEFAULT RANGE 2 0 0-2 0-2 [Baud Rate] REMARK Determines the CTI keyset mode 0: Inactive, 1: CTI m-mode, 0: 1200, 1: 2400, 2: 4800 2: CTI nm-mode Determines the baud rate of the CTI keyset [Table 3-7] CTI Station Attribute (PGM 123) 3.11 SMDR Account Group (PGM 124) Stations can be assigned as member of call account group on SMDR. A station belongs to only one call account group. The system supports 99(ipLDK600/300)/24(ipLDK100) SMDR Account Groups. All stations are not assigned as member of any Call Account Group by default Operation 1. Click [SMDR Account Group]. 2. Click [Setting], and set the station range. - 51 - ipLDK PC Admin. Issue 3.7.3 [Figure 3-14] SMDR Account Group Setting Window 3. Select an account group. 3.12 Copy DSS Button (PGM 125) The assigned DSS button of DKTU can be copied to another station or ICM group, and it is not apply to DSS BOX Operation 1. Click [Copy DSS Button]. 2. Enter station number , and select the type of destination 3. You can select the two type of destination. One is station and the other is ICM Group. 4. After enter whole data, press [Apply] button to save the data. - 52 - ipLDK PC Admin. Issue 3.7.3 [Figure 3-15] Copy DSS Button 3.13 Display Station with COS (PGM 130) This feature is linked Station COS PGM116 from ipLDK V3. Refer to PGM116 Station COS Display. 3.15 CO Group Access Station (PGM 131) This feature is linked Station COS PGM117 from ipLDK V3. Refer to PGM116 CO Group Access Display. Station IP List for CTI – Available with only ipLDK20 This feature is available with only ipLDK20. ipLDK20 does not support CTIU for CTI link. Instead of CTIU, user can make CTI connection with LAN connection. To use this feature, user should enter the IP address of PC that user want to use CTI. For example, if user uses station 10 and IP address of his is 10.0.0.5 then you should enter the table with station 10 and IP Address 10.0.0.5. User can enter this mapped table up to max station number of ipLDK20. But the limitation is depends on the lock key that is installed on ipLDK20. This feature was enabled from Ver.1.0Da.(In ipLDK20) - 53 - ipLDK PC Admin. 3.14 Hot Desk Attribute (PGM 250) Issue 3.7.3 This is for configuration of Hot desk that is added from V3. Operation 1. [Station Base Program] Æ [Hot Desk Attribute]. 2. User can change only two items in the screen. One is Hot Desk Agent Number and another is AutoLogout Timer. View Agent Range will only display the assigned range by first item. The assigned range will be started from last station. [Figure 3-16] Hot Desk Programming 3.15 OFF-NET FWD button Assign(PGM 135) This is for button assign of off-net forward that is added from V3.7. Operation 1. [Station Base Program] Æ [Station Forward button assign]. 2. User can assign off-net forward button with this PGM. This is similar to flex button PGM with PGM115. But this feature can only assign off-net forward button with one station. 3. First, enter station number and flex button number that you want to read. After that, press [Refresh] button. Then PCADM will read the current data with your input. 4. To change button, enter button number, forward type , CO type(CO/CO Group/None) and telephone number. 5. After editing the dialog, press [Update] button to save change. 6. This dialog is linked with PGM 115 flex button assign. So, if you want to current button assign data, press link button. - 54 - ipLDK PC Admin. Issue 3.7.3 [Figure 3-17] Station forward button assign - 55 - ipLDK PC Admin. 4. CO Line Base Program Use this CO Line Base Program to change CO Line features. PGM140 TO PGM147. Issue 3.7.3 The program number is from Related Admin (PGM 140/141/142/143/146/147) This PC Admin link various feature that is related each other. So, you can move to another programming with popup menu. It is very helpful to you. Operation 1. Select [CO Line List]. Then you will see below window that displays CO line basic information. (PGM140). 2. If you want to check some range, enter the range in index field. Then you will see the information for selected range. 3. Otherwise you may press the [Refresh] button. Then PC Admin will search and display information for all CO range.(1 ~ NO_OF_COLS). [Figure 4-1] CO Information Display 4. With this window, you can select some linked menu by selecting popup menu. - 56 - ipLDK PC Admin. 5. In case of selecting update menu. Issue 3.7.3 [Figure 4-2] CO line Attributes and Update window 6. Below case is the window when you select the CO Attribute 1 menu in popup menu. [Figure4-3] CO line attributes and view option window - 57 - ipLDK PC Admin. Issue 3.7.3 7. User can select the attributes that he wants to check with view menu. 8. This is same architecture for PGM 142/143/146/147 9. User also reviews the CO data without entering the CO range. It can be done from [configuration] menu directly. If you select the CO board and select [CO data view] menu of popup menu as like below figure. 10. Then PC Admin will read the data for selected board range automatically. So, you don’t need to enter the range manually.(From MPB V3 Only) [Figure 4-4] CO Data view from configuration ITEM Normal CO REMARK All lines are assigned as normal CO lines as default. Each CO line in the system can be programmed as DISA (Direct Inward System Access) line and the DISA types are as follows; - Flex BTN 1 (Day) / 2 (Night) / 3 (Weekend) - Each DISA type(BTN 1-3) has sub-attributes F1: DISA Service On/Off. F2: VMIB Message No.(Voice announcement(VMIB Message) can be assigned (00-70) and it is not assigned (00) as default - BTN 4 was added from ipLDK V3.6, On demand type. ANALOG DID Each CO line in the system can be programmed as DID (Direct Inward Dialing) line and the DID types are as follows; 1(Immediate Start) / 2 (Wink Start) / 3 (Delayed Dial Start) (BTN 1-3 are exclusive) ISDN DID/ MSN TIE TIE line types are as follows; 1 (RD) / 2 (LD) / 3 (EM-C) / 4 (EM-D) / 5(EM-I) - 58 - ipLDK PC Admin. DCO DID DCO DID Line(This type will be valid in a few country. For example, Korea) Issue 3.7.3 [Table 4-1] CO Service Type (PGM 140) ITEM CO Line Group RANGE 00-73(ipLDK600/300) 00-25(ipLDK100) 0-9(ipLDK20) CO COS 1-5 1 -CO COS 1: no restriction -CO COS 2: Exception Table A governs -CO COS 3: Exception Table B governs -CO COS 4: restricts Long Distance Code -CO COS 5: overrides STA. COS 2,3,4 and 5, 6. DISA Account Code CO Line Assign CO Line Type CO Line Signal Type Flash Type UNA CO Line Group Account CO Tenancy Group 01-15(ipLDK300/600) 01-05(ipLDK-100/20) 01 Tenancy Group of CO line. (From MPB 2.0Ba, PCADM 2.0Ba) ON/OFF POL/LOOP PBX/CO DTMF/PULSE GROUND/LOOP ON/OFF ON/OFF OFF LOOP CO DTMF LOOP OFF OFF When accessed another CO line in the system by DISA line, you should enter authorization code if this flag is set. Polarity Reverse , Loop Start When marked PBX, a 1 or 2 digit dial code may be entered after which toll restriction is applied. DTMF, Pulse Ground , Loop The allowance of Universal Night Answer service DEFAULT 01 REMARK Groups should be assigned according to CO type and Class-Of-Service. (00:private 73/25/9:not_used) [Table 4-2] CO Line Attribute I (PGM 141) ITEM CO Line Name Display CO Line Name Assign Max 12 char Metering Unit 00-06 00 RANGE ON/OFF DEFAULT OFF REMARK If CO Line name is assigned at BTN2, and this field is ON, Co name is displayed in Co incoming. Max 12 character There are 7 metering signal types: - 0 : None - 1 : 50 Hz - 2 : 12 KHz - 3 : 16 KHz - 4 : Singular Polarity Reverse (SPR) - 5 : Plural Polarity Reverse (PPR) - 6 : No Polarity Reverse (NPR) Line Drop using CPT ON/OFF OFF If this field set to ON, CPT checks the incoming CO line when answered and if CPT detects dial tone, then drops the line for toll restriction. CO Distinct Ring 0-4 0 The CO can give his own ring type signal to station in system through this field. This ring type can be programmed at PGM 422. - 59 system ipLDK PC Admin. CO Line MOH 0-13(ipLDK600/300) 0-12(ipLDK100) 0-9(ipLDK20) 1 0: Not assigned by this field. 1: Internal Music 2~4: External Music 5~7: VMIB MOH 8-12: SLT MOH 13: Hold Tone PABX CO Dial Tone YES/NO YES Issue 3.7.3 YES: In this case, PX or PABX provides dial tone. NO: In this case PX or PABX does not provide dial tone. System provides dial tone PABX CO Ring Back Tone YES/NO NO If R2 PX which does not give us tone for called party status exists, then the system provides tone according to cause value (This field is only when Cause means that Ring back is provided by PX.). YES: PX, NO: System PABX CO Error Tone YES/NO NO If R2 PX which does not give us tone for called party status exists, then the system provides tone according to cause value (This field is only when Cause means that error tone is provided by PX.). YES: PX, NO: System PABX CO Busy Tone YES/NO NO If R2 PX which does not give us tone for called party status exists, then the system provides tone according to cause value (This field is only when Cause means that busy tone is provided by PX.). YES: PX, NO: System PABX CO Announce Tone YES/NO NO If R2 PX which does not give us tone for called party status exists, then the system provides tone according to cause value (This field is only when Cause means that announcement is provided by PX, but the system provides only error tone.). YES: PX, NO: System CO Flash Timer Open Loop Detect Timer Line Length Disa Answer timer DISA/DID Delay Tmr Reserved Busy Error CPT 000 – 300 00 – 20 SHORT/LONG 1–9 1-9 On/Off 005 00 SHORT 5 2 Off 10 msec base 100 msec base Line Length of CO.(TELKOM only.) Disa Answer timer DID/DISA Delay Timer(From 3.5Ab) Moved from PGM160-F16 [Table 4-3] CO Line Attribute II (PGM 142) ITEM COLP Table Index RANGE 00 - 50 DEFAULT Not Assigned entry. (PGM 201) 00~49: PGM 201 Bin No. / 50: PGM 11-BTN 5 CLIP Table Index 00 - 50 Not Assigned To make calling party number with assigned CLIP Table entry. (PGM 201) 00~49: PGM 201 Bin No. / 50: PGM 11-BTN 5 - 60 REMARK To make called party number with assigned COLP Table ipLDK PC Admin. Call Type 0-4 2 0: Unknown 1: International 2: National 3: Not used 4: Subscriber DID CONV Type 0-2 0 Issue 3.7.3 0: convert digits by DID Dgt Conversion (PGM230) 1: call to the valid extension. 2:convert digits by Flex DID Table (PGM231) DID Remove No. ISDN Enblock Send CLI Transit 00 - 99 ON/OFF ORI(1)/C FW(0) Not Assigned OFF CFW(0) Remove received digits from the left as to the assigned # ON: Enblock Sending Mode OFF: Overlap Sending Mode ORI : Send CLI as the originate caller’s CLI. CFW : Send CLI as the call forwarded station’s CLI. Numbering Plan Id ISDN Call Deflection ISDN 1 Digit Remove CLI Type 0–7 Enable/ Disable ON/OFF 0~2 0 Disable OFF 0(Normal) F1 : Calling NPI / F2 : Called NPI ISDN call deflection service usage. Norway only. If ISDN incoming CPN type is unknown-unknown type, then the first digit is removed. Italy only. 0 : Normal, 1 : Long CLI 1, 2 : Long CLI 2(V3.2Aa) ipLDK20 : Added from V2.1Aa(MP),3.2Ba(PC) [Table 4-4] ISDN CO Attribute (PGM 143) Incoming Prefix Code Insertion Outgoing Prefix Code Insertion ISDN Line Type Calling Sub-address ON / OFF ON / OFF μ-Law/ A-Law ON/OFF OFF ON A-Law (OFF) OFF (NO) If this value is set to ON, prefix code will be attached in front of incoming CLI. If this value is set to ON, prefix code will be attached in front of outgoing CLI. This value is used to set ISDN CODEC Type. If this value is set to ON, calling party subaddress of the ISDN station is attached when an ISDN station makes an outgoing CO Call through this CO Line. This value is used as count of the received DID Digit number to route DID incoming Call. When DID Conversion Type(ADMIN 143 – FLEX4) is set to 0, The received DID digits are converted by this value. The number 0 ~ 9, #, * can be entered. # means to ignore received digit, and * means to bypass the digit. The length of DID Digit Mask is 4. e.g.) ‘1234’ is received when DID Digit Mask is set as ‘#8**’, the digit is converted as ‘834’. f this feature is set to ON(1,2), R2 collect call is served DID DGT Receive Number DID Digit Mask 2–4 4 digits (d.*,#) 4 #*** R2 Collect Call 0 : Disable 1 : Without Indicator 2 : With Indicator Disable - 61 - ipLDK PC Admin. Collect Make Timer Collect Break Timer 10 20 0 - 250 0 - 250 Issue 3.7.3 This feature is used when R2 call is answered (Brazil only) This feature is used when R2 call is answered (Brazil only) [Table 4-5] CO Attributes III (PGM 146) 4.2 CO Ring Assignment (PGM 144/145) Each station can be assigned to receive a CO ring for only a certain period of time such as day, night, weekend and ON-DEMAND. Operation 1. Select the [CO Ring Assignment]. 2. Select CO Number in [CO Num] field to read the data. 3. If you want to change some data, select [Update] menu in popup menu. After change each destination and delay, press [Update] button to save changes. [Figure 4-5] CO Ring Assignment Setting Window 4. Select a CO Ring Assignment, above picture will be showed. With this screen, user can assign the incoming ring and check. - 62 - ipLDK PC Admin. Issue 3.7.3 4.3 AC15 CO Line Attributes (PGM 149) – Not available with ipLDK20 This PGM can program AC15 CO Attributes. This grogram is only for AC15 CO Board. Operation 1. Click [AC15 CO Line Attributes]. 2. Enter the CO range that you want to program AC15 CO attributes. Then current values will be displayed. 3. Select or enter each field and press the [Update] button to save data. [Figure 4-6] AC15 CO Attributes (PGM 149) 4.4 SMS Attributes (PGM292) This PGM can program stations that can use SMS feature of system. User can assign stations with each CO line and its usage is similar to station group(HUNT group programming). Operation 1. Click [SMS Attribute]. 2. Enter the CO range that you want to program SMS assign and press [Refresh] button to receive the data. Then current assigned station list will be displayed. 3. Select [Update] button to edit or add stations with any CO line. 4. Edit stations from station list with SMS outgoing CO and Non-CID SMS field. 5. After setting all items, press [Update] button for saving the changes. - 63 - ipLDK PC Admin. Issue 3.7.3 [Figure 4-7] SMS Attribute main (PGM 292) [Figure 4-8] Station assign window with each CO (PGM 292) - 64 - ipLDK PC Admin. 5. System Base Program Use this System Base Program to change any system features. Issue 3.7.3 5.1 System Attributes (PGM 160/161/163) It changes system attribute. Operation 1. Select System Attributes in main menu. 2. Then System Attribute 1 window will be displayed and you can select the attribute II or III by pressing each button. 3. Then you can view the current setting and update each field. 4. After editing, press the [Update] button to save the changes. [Figure 5-1] System Attribute - I Setting Window 5. Refer to the tables below, and change the values. - 65 - ipLDK PC Admin. ITEM Attendant Call Queuing Ringback Tone ON/OFF OFF RANGE DEFAULT REMARK when calling busy attendant station. Issue 3.7.3 ON: The station will be present ring back tone OFF : The station will be present MOH, hold tone or DVU-MOH by system database (PGM 171BTN 2) CAMP RBT/MOH CO Line Choice RBT/MOH LAST/ROUND MOH LAST MOH is heard in camp-on or Ringback tone is heard in camp-on. The method of a CO line seizing on CO Line Groups access. When the DISA user fails to call Station or access DISA Retry Counter feature, then DISA user can retry other call or 0-9 3 feature within this retry counter. If DISA user cannot access appropriately within this counter, system disconnects the DISA Line automatically. ICM Continuous Dial-Tone CO Dial-Tone Detect External Night Ring Hold Preference Multi-line Conference Prt LCR Conv Dgt Conference Warning Tone Offnet Prompt Usage Offnet DTMF Tone CO Voice Path Connect Transfer Tone CO to CO Xfer CPT Check Call Log List Num CONT/DISCONT ON/OFF CONT OFF This field set whether ICM dial tone is continuous or not. When the speed dial is activated, system detect dial tone using CPT instead of pause timer. When CO lines are marked to UNA, ringing will ON/OFF SYS/EXEC ON/OFF OFF SYS ON be sent to LBC1 when an incoming call occurs on those lines during night service. System hold or exclusive hold The system allows a conference with multi-CO lines. Print dialed digits or LCR conversed digits in ON/OFF OFF LCD, (Except AUS_TELSTRA) ON / OFF ON / OFF ON / OFF ON ON ON When entering conference, members will be heard warning Tone In case of Offnet call forward, offnet prompt will be heard.(It is only applied to CO-to-CO Transfer) In case of Offnet call forward, DTMF Tone will be heard.(It is only applied to CO-to-CO Transfer) Option to connect voice path after seizing CO IMM/DGT DGT line. Immediately. (CIS and Korea only) RBT/MOH OFF/ON 15~20 MOH OFF 15 Option to provide ring-back tone or MOH during transferring CO line. Moved to PGM142-F18 (from V3.7Aa) Number of call log. From V3.1Aa ipLDK20 : Added from V2.1Aa(MP),3.2Ba(PC) [Table 5-1] System Attribute - I (PGM 160) - 66 - ipLDK PC Admin. ITEM Network Time/Date Setting Off-Hook Ring Type Override 1st CO Group Page Warning Tone RANGE ON/OFF MUTE/BURST DEFAULT OFF MUTE REMARK the network time/date. Issue 3.7.3 If this field is ON, the system time/date are set by The system can be programmed off-hook ring type to mute or one burst ring. If there is no available CO line in the 1st CO group, system access the next accessible CO group when this field is ON. If desired, page warning tone can be suppressed. The system can be programmed to override CO line call to gain access to the conversation. If ON/OFF ON/OFF ON ON Auto Privacy ON/OFF ON privacy is disabled, a station privileged to override in PGM113-Btn4 joins an existing call in progress. Privacy Warning Tone ON/OFF ON If desired, privacy warning tone can be suppressed. Changes a cadence of ICM or incoming CO ring. In case of NO, Single Ring for Co Call YES/No NO ICM: 1sec on/ 4sec off CO : 0.4s on/ 0.2s off/ 0.4s on/ 4sec off In case of YES, a cadence is the reverse. WTU Auto Release ACD Print Enable ON/OFF 1:ON(10s unit) / 0:OFF 001 –255 (3 Digits) ON/OFF 00 - 31 HOUR(1) /SEC(0) ON/OFF OFF OFF Enable or disable auto release of WTU Enable or disable ACD Print features Determines the amount of time between repeated ACD Print Timer Clear ACD Database after Print VMIB Prompt Gain ACD Print Timer Unit Clear ACD Database after Print VMIB Prompt Gain VM with CLI Info 001 ACD database prints. Zero means no print out. (10 sec base) Determines if initialize ACD database after printout. To control prompt gain level. To assign the unit of print timer Determines that initialize ACD database after print-out. To control prompt gain level. When Voice Mail information printed through OFF 08 SEC OFF 00-31 08 ON / OFF OFF RS232 port by SMDI, if this is ‘ON’, CLI is added. Determines the unit of ACD Print timer of Flex ACD Print Timer Unit Set VM SMDI Type HOUR/ SEC TYPE II/ TYPE I SEC Btn 10 (1 hour or 10 seconds). Set VM SMDI type (Refer RS232 Spec). TYPE I - 67 - ipLDK PC Admin. Incoming Toll Check Reserved Enable or disable LED of CO button while DSS Indication ON/OFF ON ON/OFF OFF call Issue 3.7.3 Enable or disable to toll check for incoming ringing for incoming, transfer and recalling. It is not applied for direct ringing such as DID/DISA. If authorization is failed with PGM227, COS COS 7 When Auth Fail LCR Dial Tone Detect ON/OFF ON will be COS 7 or not with this setting. From ipLDK 3.3Aa, PCADM 3.3Aa Added from V3.6 ON/OFF OFF [Table 5-2] System Attribute - II (PGM 161) ITEM Alarm Enable Alarm Contact Type Alarm Mode Alarm Signal Mode RANGE ON/OFF CLOSE/OPEN ALARM / BELL RPT/ONCE RPT Repeat , Once DEFAULT OFF CLOSE ALARM Close, Open Alarm, Door Bell REMARK [Table 5-3] Reference for Alarm Attributes (PGM 163) 5.2 Admin Password (PGM 162) Password is not assigned as default. Operation 1. Click [ADMIN Password]. 2. Put 4 digits for Admin Password. [Figure 5-2] Administration Password Setting Window 5.3 Attendant Assignment and DVU annc.#(PGM 164/165) Maximum 5 Attendants can be assigned, and it is including the Main Attendants and System Attendant. The system attendant is different with main attendant in aspect of the call handling and system management priority. The system attendant has more powerful priority than main attendant. 1 system attendant and 4 main attendants can be assigned. So the sum - 68 - ipLDK PC Admin. Issue 3.7.3 of system and main attendants must be less than 5. As default, the System Attendant is assigned Station 101, and others are not assigned. Operation 1. Click [Attendant Assignment]. 2. Assigning a system attendant (Net Number is not available) 3. Assigning a main attendant (Network connected extension available). - Delete edit box to delete an assigned main attendant. - If you enter invalid net number, MPB will check validation of entered net number when you press [Update] button. [Figure 5-3] Alarm Attributes Setting Window 5.4 CO-to-CO COS (PGM 166) When a user of DID/DISA/TIE line accesses another CO line, CO-to-CO COS is applied. The attributes of CO-to-CO COS are the same as the station COS. Operation 1. Click [CO-to-CO COS]. - 69 - ipLDK PC Admin. Issue 3.7.3 [Figure 5-4] CO-to-CO Setting Window 2. Put the numbers in and press [Update] button. 5.5 DID/DISA Destination (PGM 167) A station can be arranged to forward a DID call to the attendant if the station is busy. Vacant or invalid calls are sent to the Main Attendant, or busy tone is presented by admin programming. Operation 1. Click [DID/DISA Destination]. 2. Error Destination (When a wrong number is pressed) - TONE : A tone will be heard. - ATD : Call will be forwarded to the attendant. - Station Group : Call will be forwarded to a station group. 3. Busy Destination (When a station is busy) - TONE : A tone will be heard. - ATD : Call will be forwarded to the attendant. - Station Group : Call will be forwarded to a station group. 4. No Answer Destination (When there is no answer), input a station group to be forwarded. - TONE : A tone will be heard. - ATD : Call will be forwarded to the attendant. - Station Group : Call will be forwarded to a station group. - 70 - ipLDK PC Admin. Issue 3.7.3 [Figure 5-5] DID/DISA Destination Setting Window 5. VMIB Prompt Usage is added in version 1.0Ba. So, this feature is available in 1.0Ba(PC software) and 1.0Dd(MPB software) or later. 5.6 External Control Contact (PGM 168) Loud Bell Control, Door Open, External Device Control could be set to use by external control contact. The contact feature is ranged from 1 to 7(ipLDK300/300E). A default value is not assigned. Operation 1. Click right button of mouse and select [Update]. Then you will see below window 2. After editing, press [Update] button on update panel to save changes. 4 Select one of the control contacts. 5 In case of Loud Bell Control, you should indicate a station to be assigned. - 71 - ipLDK PC Admin. Issue 3.7.3 [Figure 5-6] External Control Contact Setting Window in ipLDK600/300 5.7 LCD Data/Time/Language Display Mode (PGM 169) You may set a different time/date/language on LCD screen. Operation 1. Click [LCD Data/Time/Language Display Mode]. 2. LCD Time Mode : 12 Hour Mode or 24 Hour Mode. 3. LCD Date Mode : MM-DD-YY or DD-MM-YY. 4. LCD Language : Select which language. [Figure 5-7] LCD Date Display format Change Window 5.8 Modem (PGM 170) It is to be specified which station or CO line is connected to the modem. The last station 399 is assigned as default. And CO line isn’t assigned any default value at all. Operation - 72 - ipLDK PC Admin. Issue 3.7.3 1. Click [Modem]. 2. The range for station is 1000~1599(ipLDK600 / 100~399(ipLDK300) / 100 ~ 227(ipLDK100) / 10 – 37(ipLDK20), and Co Line is 1~400(ipLDK600) / 1~200(ipLDK300) / 1~40(ipLDK100) / 1~12(ipLDK20, 16 is max co number from version 2.0Aa). [Figure 5-8] Modem Setting Window 5.9 Music (PGM 171) You may assign BGM(Background Music), MOH(Music On Hold), and ICM Box Music Channel. MOH is the music a caller can hear while waiting for his call to be picked up again. Operation 1. Click [Music]. [Figure 5-9] Music Source Selection Window - 73 - ipLDK PC Admin. 2.Refer to the table below and set the values. ITEM RANGE DEFAULT 00: No BGM 02: External Music 1 04: External Music 3 BGM Type 00-12 01 06: VMIB BGM 2 08: SLT 1 10: SLT 3 12: SLT 5 00: NOT_ASG 02: External Music 1 04: External Music 3 MOH Type 00-13 01 06: VMIB BGM 2 08: SLT 1 10: SLT 3 12: SLT 5 00: No BGM 02: External Music 1 04: External Music 3 ICM Box Music Channel 00-12 01 06: VMIB BGM 2 08: SLT 1 10: SLT 3 12: SLT 5 Flex. 1-5 (+ SLT MOH 1-5 Assign SLT MOH SLT STA No.) Dial Tone Source ICM Ring Back Tone Src CO Ring Back Tone Src 0~5 0~5 0~5 0(N/A) 0(N/A) 0(N/A) Source for Dial Tone, V3.1Aa ipLDK20 : Added from V2.1Aa(MP),3.2Ba(PC) Source for ICM Ring Back Tone, V3.1Aa ipLDK20 : Added from V2.1Aa(MP),3.2Ba(PC) Source for ICM Ring Back Tone, V3.1Aa ipLDK20 : Added from V2.1Aa(MP),3.2Ba(PC) 01: Internal Music 03: External Music 2 05: VMIB BGM 1 07: VMIB BGM 3 09: SLT 2 11: SLT 4 13: Hold Tone 01: Internal Music 03: External Music 2 05: VMIB BGM 1 07: VMIB BGM 3 09: SLT 2 11: SLT 4 REMARK 01: Internal Music 03: External Music 2 05: VMIB BGM 1 07: VMIB BGM 3 09: SLT 2 11: SLT 4 Issue 3.7.3 [Table 5-4] Reference for Music (PGM 171) in ipLDK600/300 ITEM RANGE DEFAULT 00: No BGM 02: External Music 1 BGM Type 00-11 01 04: External Music 3 06: VMIB BGM 2 08: SLT 2 10: SLT 4 REMARK 01: Internal Music 03: External Music 2 05: VMIB BGM 1 07: SLT 1 09: SLT 3 11: SLT 5 - 74 - ipLDK PC Admin. 00: NOT_ASG 02: External Music 1 04: External Music 3 MOH Type 00-12 01 06: VMIB BGM 2 08: SLT 2 10: SLT 4 12: Hold Tone 00: No BGM 02: External Music 1 ICM Box Music Channel 00-11 01 04: External Music 3 06: VMIB BGM 2 08: SLT 2 10: SLT 4 Flex. 1-5 (+ SLT MOH 1-5 Assign SLT MOH SLT STA No.) Dial Tone Source ICM Ring Back Tone Src ICM Ring Back Tone Src 0~5 0~5 0~5 0(N/A) 0(N/A) 0(N/A) Source for Dial Tone, V3.1Aa ipLDK20 : Added from V2.1Aa(MP),3.2Ba(PC) Source for ICM Ring Back Tone, V3.1Aa ipLDK20 : Added from V2.1Aa(MP),3.2Ba(PC) Source for ICM Ring Back Tone, V3.1Aa ipLDK20 : Added from V2.1Aa(MP),3.2Ba(PC) 01: Internal Music 03: External Music 2 05: VMIB BGM 1 07: SLT 1 09: SLT 3 11: SLT 5 01: Internal Music 03: External Music 2 05: VMIB BGM 1 07: SLT 1 09: SLT 3 11: SLT 5 Issue 3.7.3 [Table 5-5] Reference for Music (PGM 171) in ipLDK100 * In case of ipLDK20, there are special notification in above table. Refer to the table for ipLDK20. 5.10 PBX Access Code (PGM 172) You can make an outside call through the station. Maximum 4 PABX Access Codes are assignable. PABX Access Code is 1 or 2-digit number. By default, PABX Access Codes are not assigned at all. Operation 1. Enter 1 or 2 digits code in the below window. If you want to delete code, leave blank. 2. Press [Update] button to save the changes. - 75 - ipLDK PC Admin. Issue 3.7.3 [Figure 5-10] PBX Access Code Setting Window 5.11 PLA(Preferred Line Answer) Priority (PGM 173) You may set up which call to be received. Operation 1. Click [PLA Priority]. Each item has the following meaning. order to receive each call by their priority. z XFR : Transfer Call z REC : Recall z INC : Incoming Call z QUE : Queued Call And number them in 2. You can not assign a duplicated number. If you assign a duplicated number and click [Update], the program automatically reassigns the priority. [Figure 5-11] PLA Priority Setting Window 5.12 RS-232C Port Setting (PGM 174) You can set up RS-232C port configuration. - 76 - ipLDK PC Admin. Issue 3.7.3 <NOTICE> If you use the COM3 as MODU(MODEM interface), you should keep in mind that the maximum speed is limited to 9600bps. If you use the COM1/2/4/5 for PC ADMIN, you should keep in mind that the maximum speed is limited to 9600bps. Operation 1. Click [RS-232C Port Setting]. Default values are shown below for each port. [Figure 5-12] RS-232C Port Display Window in ipLDK-600/300 [Notice 1 ] In ipLDK-100, COM4 and COM5 are not available. [Notice 2 ] In ipLDK-200, COM3/ COM4 and COM5 are not available. COM2 is used for MODU device. 2. Press [Update] in popup menu, and change the values. [Figure 5-13] RS-232C Port Attributes Setting Window ITEM RANGE DEFAULT REMARK - 77 - ipLDK PC Admin. BAUDRATE 0-8 19200 0: UNKNOWN 2: 1200 BAUD 4: 4800 BAUD 6: 19200 BAUD 8: 57600 BAUD CTS/RTS P-BREAK LPP ON/OFF ON/OFF 001-199 OFF OFF 060 1: UNKNOWN 3: 2400 BAUD 5: 9600 BAUD 7: 38400 BAUD Issue 3.7.3 [Table 5-6] Reference for COM Port Setting (PGM 174) 5.13 Print Serial Port Selection (PGM 175) You can change the usage the print serial port. You can change the various input port for application. <NOTICE> The PC Admin port is only displayed and you can’t change the value. If the PC Admin port is COM1~COM5(ipLDK300) / COM3(ipLDK100) for PC application(PC Admin, PC Attendant, CTI), you can’t use those ports (COM1~COM5 (ipLDK300)/COM3(ipLDK100)) as normal terminal port during using PC Admin. Except PC Admin, you have to change the ports related with PC application to DEFAULT VALUE(Network) before you use those ports as normal usage(Trace, SMDR Printing…). If you do not change those values, system may produce some problems. Operation 1. Click [Print Serial Port Selection]. [Figure 5-14] Print Serial Port Selection Window 2. Refer to the table below and change the values. ITEM RANGE DEFAULT - 78 REMARK ipLDK PC Admin. Off-line SMDR/Statistics Print ADMIN Print TRAFFIC SMDI Print Call Information Info/On-line SMDR Trace Debug PC Admin PC Attendant CTI Remote Diagnostic 01-13/11/10 01-13/11/10 01-13/11/10 01-13/11/10 01-13/11/10 01-13/11/10 01-13/11/10 01-13/11/10 01-13/11/10 01-13/11/10 01-13/11/10 COM2 (02) COM2 (02) COM2 (02) COM2 (02) COM2 (02) COM2 (02) COM2 (02) NET_PCADM (10) NET_PCATD (11) NET_CTI (12) NET_REMOTE (13) 01-13/11/10 COM2 (02) 01: COM1 02: COM2 03: COM3 – MODU Issue 3.7.3 04: COM4 – MISB(Only for ipLDK300) Æ Not Available in ipLDK100 05: COM5 – MISB(Only for ipLDK300) Æ Not Available in ipLDK100 06: TELNET 1 (04 in ipLDK 100) 07: TELNET 2 (05 in ipLDK 100) 08: TELNET 3 (06 in ipLDK 100) 09: ISDN (07 in ipLDK 100) 10: NET_PCADM (08 in ipLDK 100) 11: NET_PCATD (09 in ipLDK 100) 12: NET_CTI (10 in ipLDK 100) 13: NET_REMOTE (11 in ipLDK 100) [Table 5-7] Print Serial Port Selection (PGM 175) [Notice 1] In ipLDK 100, [RANGE] is from 01 to 11. [Notice 2] In ipLDK 20, [RANGE] is from 01 to 10. <Important Notice> If you select the MODU for PC Admin connection, port speed will be limited upto 9600 bps. If you select the value more than 9600 bps(for example 19200bps), you might have some problem during connection. 5.14 Pulse Dial / Speed Ratio (PGM 176) If the type of CO line is PULSE instead of DTMF, it decides pulse dial ratio. In ipLDK-600/300, pulse dial speed ratio is set for only 10 PPS. Operation 1. Click [Pulse Dial / Speed Ratio]. Default value is displayed. 2. Change the ratio. [Figure 5-15] Pulse Dial / Speed Ration Setting Window - 79 - ipLDK PC Admin. 5.15 SMDR Attributes (PGM 177) Issue 3.7.3 Station Message Detail Recording (SMDR) will provide details on both incoming and outgoing calls. As an assignable database option, if Long Distance/All Call is selected, incoming and outgoing local and long distance calls are all provided. If only Long Distance is selected, then only outgoing calls that meet the toll check status requirements listed below are provided. Operation 1. Click [SMDR Attributes]. [Figure 5-16] SMDR Attributes Setting Window 2. Refer to the table below, and put the values. ITEM SMDR Save Enable RANGE ON/OFF DEFAULT OFF REMARK The system can be set to record either all outgoing calls (ALL) or only limit set by timer in Btn12 (SMDR Start Timer) - 80 - ipLDK PC Admin. SMDR Print Enable ON/OFF OFF Timer) Long Distance / Call Recorded All LD/All Call LD Issue 3.7.3 The system can be set to real time print either all outgoing calls(ALL) or only limit set by timer in Btn12 (SMDR Start The system can be set to record either all outgoing calls or only long distance calls, exceeding time limit set by SMDR Start Tmr. The long distance calls are identified by SMDR long distance code programming (BTN 15). SMDR Long Distance Call Digit Counter Print Incoming Call Print Lost Call Records in detail 07-15 ON/OFF ON/OFF ON/OFF 07 OFF ON ON If SMDR digit counter is more than this value, system considers it as long distance call. If this option (PIC) is set to ENABLE, all incoming calls are printed with either all outgoing calls or long distance calls. If this option (PLC) is set to ENABLE, all lost calls are printed with either unanswered or not. Due to limited system memory size, in places where many calls take place, the SMDR record buffer can easily saturated. So, if the customer doesn't need the detailed call information but total call, total metering count and total cost for individual station, then it is possible to save only the total accumulation, rather than the whole detailed records. SMDR Dial Digit Hidden SMDR Currency Unit 0-9 3 Char 0 - According to this value, ‘*’ symbol will be hidden in the SMDR digits. For easy identification of call cost, the currency unit can be input with 3 alphabet characters to be printed in front of call charge amount. SMDR Cost Per Unit Pulse SMDR Fraction SMDR Start TMR SMDR Hidden Dgt SMDR Long Distance Codes MSN Print On SMDR Print Caller Number ICM SMDR Save ICM SMDR Print SMDR Interface Service I-SMDR Connection Type 6 digits 0-5 000-250 Right/ Left Flex. BTN 1–5 ON/OFF ON/OFF ON/OFF ON/OFF ON/OFF SIO/LAN OFF OFF OFF OFF OFF SIO 0 0 000 Right This is the call cost unit per cost metering pulse, which is send from the Central Office. This value means the decimal position point of the co per unit pulse. 1 sec base Hide digits from right or left Maximum 5 SMDR Long Distance codes are available. SMDR Long Distance code is 1 or 2 digits number. By default, SMDR Long Distance Code is 0. Enable or Disable printing MSN on SMDR From : 2.1Aa(ipLDK20), 3.1Ab(Other ipLDKs), Enable or Disable printing Caller Number From : 2.1Aa(ipLDK20), 3.1Ab(Other ipLDKs), If this value is set to ON, ICM call data is stored in Off-line SMDR If this value is set to ON, ICM call data is printed in On-line SMDR From : ipLDK V3.7, ARIA SOHO Initial version. From : ipLDK V3.7, ARIA SOHO Initial version. [Table 5-8] Reference for SMDR Attributes (PGM 177) - 81 - ipLDK PC Admin. 5.16 System Date / Time (PGM 178) You can set up the system date/time. Operation 1. Click [System Date/Time]. Issue 3.7.3 [Figure 5-17] System Date Setting Window 2. Set the values and click [Update] Button. Then the changed values will be displayed on the LCD screen of your keyset right now. 5.17 Linked Station Pairs Table (PGM 179) You can link two stations in a pair, possible to make 64(14 : ipLDK20) pairs in maximum. Operation 1. Select [Update Tool] for add or delete station pair. And enter a station number to be linked with or delete. 2. To delete a pair, erase slave area or pres [Delete] button. After changing data, press [Update] button to save changes. 3. From V3.0B, there is a modification with GUI. In previous version, table showed all index whether there is a linked station or not. And user couldn’t distinguish master and slave station. 4. From V3.0B, there will be displayed a station that has slave station. And slave station will not be displayed in master field. So, user doesn’t need to be confused with this list. 5. In below example, there are two lists in the table and other area does not display anything that is not used. - 82 - ipLDK PC Admin. Issue 3.7.3 [Figure 5-18] Linked Station Pair Setting Window 5.18 System Timers I – III (PGM 180, 181,182) You can set up the system timer. You can change the interval of time that each event occur. Operation 1. Click [System Timers], select an item to be altered, and click [Update Tool ] to change some value. - 83 - ipLDK PC Admin. Issue 3.7.3 . [Figure 5-19] System Timer I Setting Window 2. Enter a value within the range specified in the range box. 6. Refer to the table below for each timer. ITEM Attendant Recall Timer Call Park Recall Timer Camp-on Recall Timer Exclusive Timer I-Hold Recall Timer Sys Hold Recall Timer Hold Recall RANGE 00 - 60 (2 Digits) 000 - 600 (3 Digits) 000 - 200 (3 Digits) 000 - 300 (3 Digits) 000 - 300 (3 Digits) 000 - 300 (3 Digits) DEFAULT 01 (min) 120 (sec) 030 (sec) 060 (sec) 030 (sec) 030 (sec) Determines the amount of time before a call placed on system hold will recall the station placing the hold. Determines the amount of time before a call placed in a call park location will recall the station placing the park. If a station transfers to busy station and hang up, this recall timer is assigned. Determines the amount of time before a call placed on exclusive hold will recall the station placing the hold. Determines the amount of time before a call recalls the attendant. REMARK Determines the amount of time before system disconnects the call. - 84 - ipLDK PC Admin. Transfer Recall Timer 000 - 300 (3 Digits) ACNR Delay Timer 000 - 300 (3 Digits) 030 (sec) 030 (sec) transferring the call. Issue 3.7.3 Determines the amount of time a transferred call will ring at the station receiving the transfer and how long it will recall the station When ACNR Pause Timer expires and there is no available CO Line in the group, this timer is invoked. When ACNR Delay Timer expired, - Invoke ACNR Pause Timer if is no available CO line Still, ACNR is activated. ACNR No Answer Timer ACNR Pause Timer ACNR Retry Counter 10 - 50 (2 Digits) 005 - 300 (3 Digits) 1 - 30 30 (sec) 030 (sec) 03 This Timer is invoked after system detects CO ring When expired, ACNR is activated. (For CIS : 5-300) back tone or voice from CO party. After this timer, system retries ACNR. This is decreased every time station retries ACNR, ACNR is canceled if set to 0. (For CIS : 1-9) ACNR Tone Retry No 1-9 (1digit) 000 - 300 (3 Digits) 1 (5sec) 030 (sec) 030 (sec) 030 (100ms) 10 (sec) 0 (min) 01 (100ms) 020 (100ms) 060 (100ms) 2 (100ms) 180 (1sec) 1 means 5 seconds, ipLDK will wait this value to decide NO TONE. 3 means 15 seconds. (Only for CIS) This timer is invoked upon completion of dialing and system considers the CO party as busy in the case that CPTU cannot detect the valid tone type until this timer expires. Uncompleted CO call will be automatically released after this timer. This field is used for the CCR inter-digit timer in the DISA/DID CO line. In DID type 2, it is used for DID inter-digit timer. If prepaid money is going to expire during a CO conversation, give warning tone and after this time the call will be disconnected. This timer also used for Call Restriction, Unsupervised Conference. Outgoing CO call time is allowed for this time. ACNR Tone Detect Timert Automatic Timer. CCR Inter-Digit Timer CO Call Drop Warning Timer CO Timer CO Dial Delay Timer Call Restriction ) CO Release 020 - 300 (3 Digits) 000 - 255 (3 Digits) 00 - 99 (2 Digits) 00-99 (2Digits 00 - 99 (2 Digits) Voice connection to the outside party will be made after this timer. This can be used to prevent illegal dialing in case of slow response from the Central Office Line or PBX. The CO Release Guard Timer controls the time necessary to guarantee idle loop state when the line is released. This timer is to secure time interval between incoming ringing signals so that the active ringing can be lasted in the system until this timer is expired. The CO Ring On Timer controls the time necessary to detect an outside line as ringing into the system. Determines the amount of time before receiving warning tone in order to remind the call elapsed time in case of outgoing CO conversations (Only for Korea ).
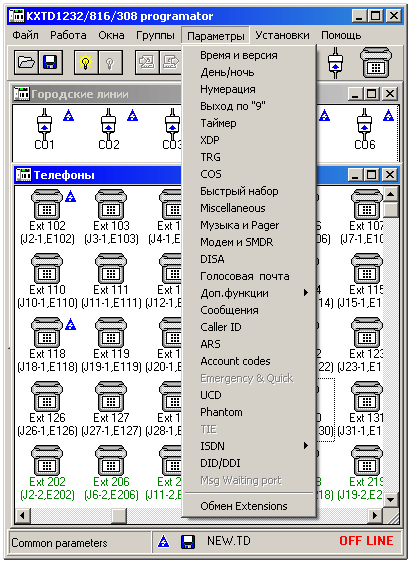
Комплектующие для АТС ARIA SOHO; Цифровые телефонные аппараты Инструкция пользователя программы PC Admin - программирование АТС версий 3.х TSP драйвер для программы ezPhone версии 3.1En (англ. язык).
PC Admin - программа администрирования АТС для версий 3.7 (англ. язык) Инструкция пользователя программы PC Admin - программирование АТС.